
For my astronomical instrument, I wanted to build onto the web UI features that that American Museum of Natural History has been developing for Open Space. This document is a pretty good guide to how they’ve developed both the native UI and the web UI for Open Space so far. The advantage of the web UI is that anyone giving a planetarium show can easily control what is displayed in Open Space, and Open Space be projected as the show on any relevant projectors.
Open Space is quite beautiful and powerful, but it’s not necessarily easy to make use of all of its features (which admittedly, I am still learning).
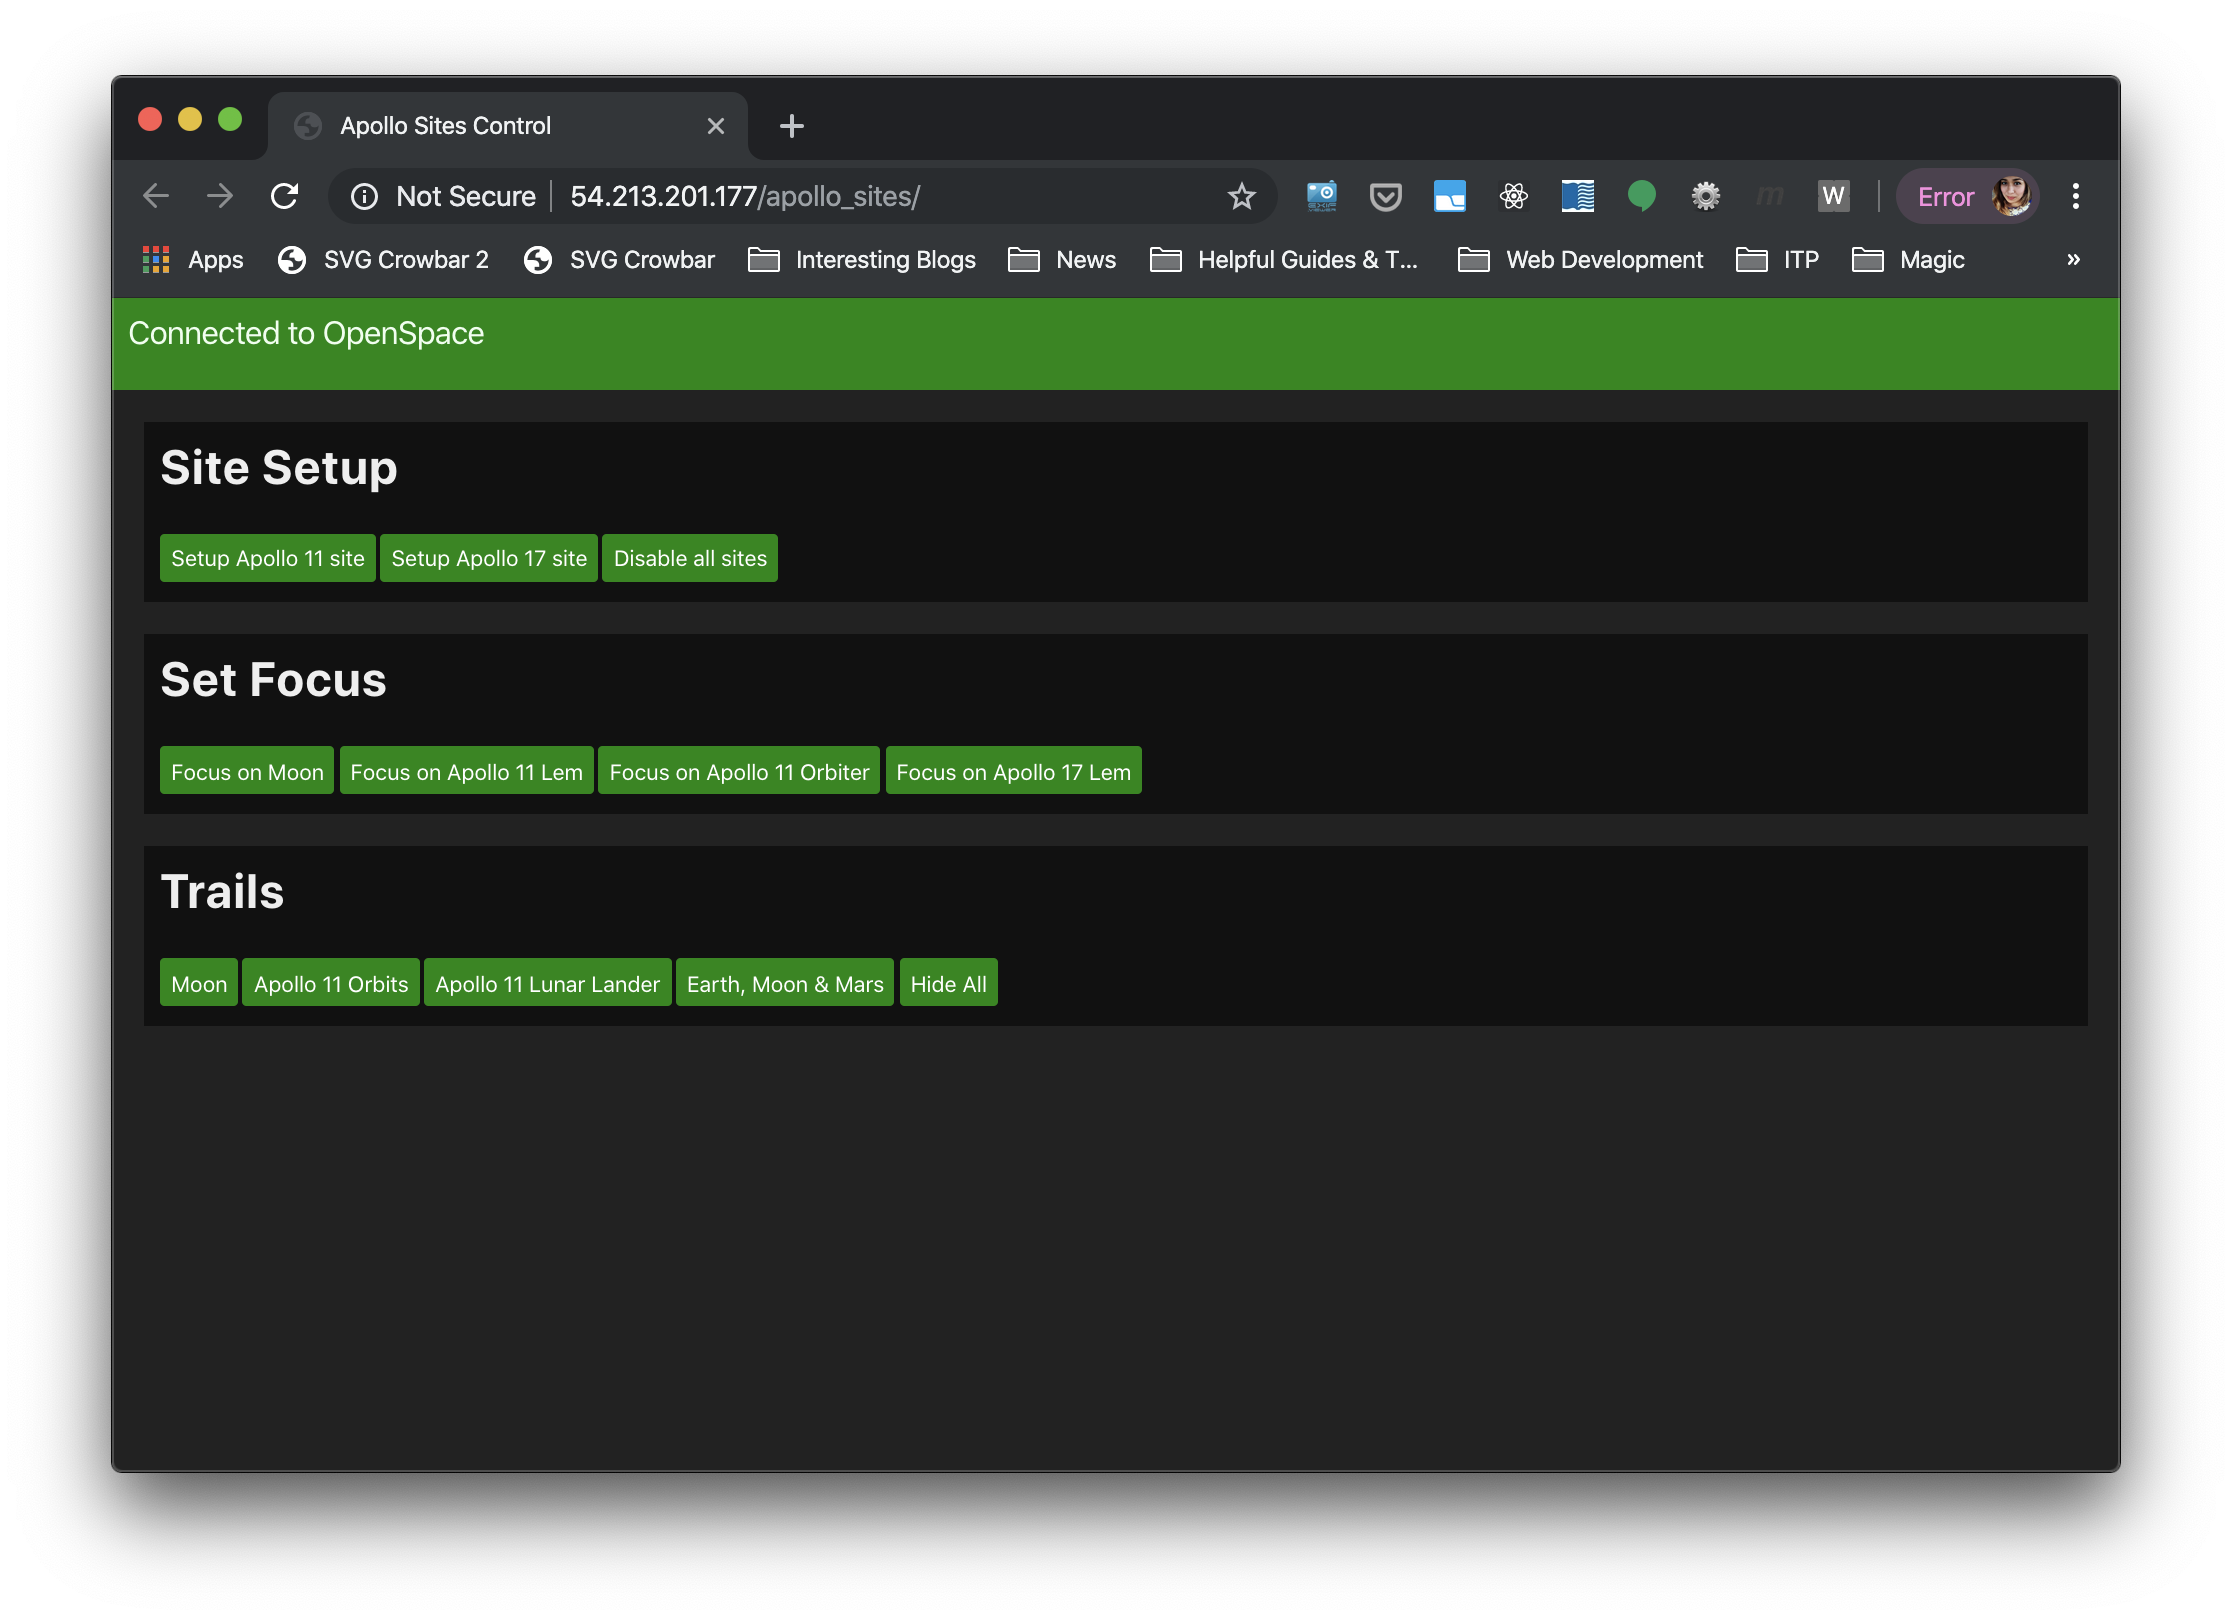
Micah Acinapura, from AMNH, has already started building out the following web interface, and has shared his code to see what could be developed for the specific needs of the Lower East Side Girls Club.
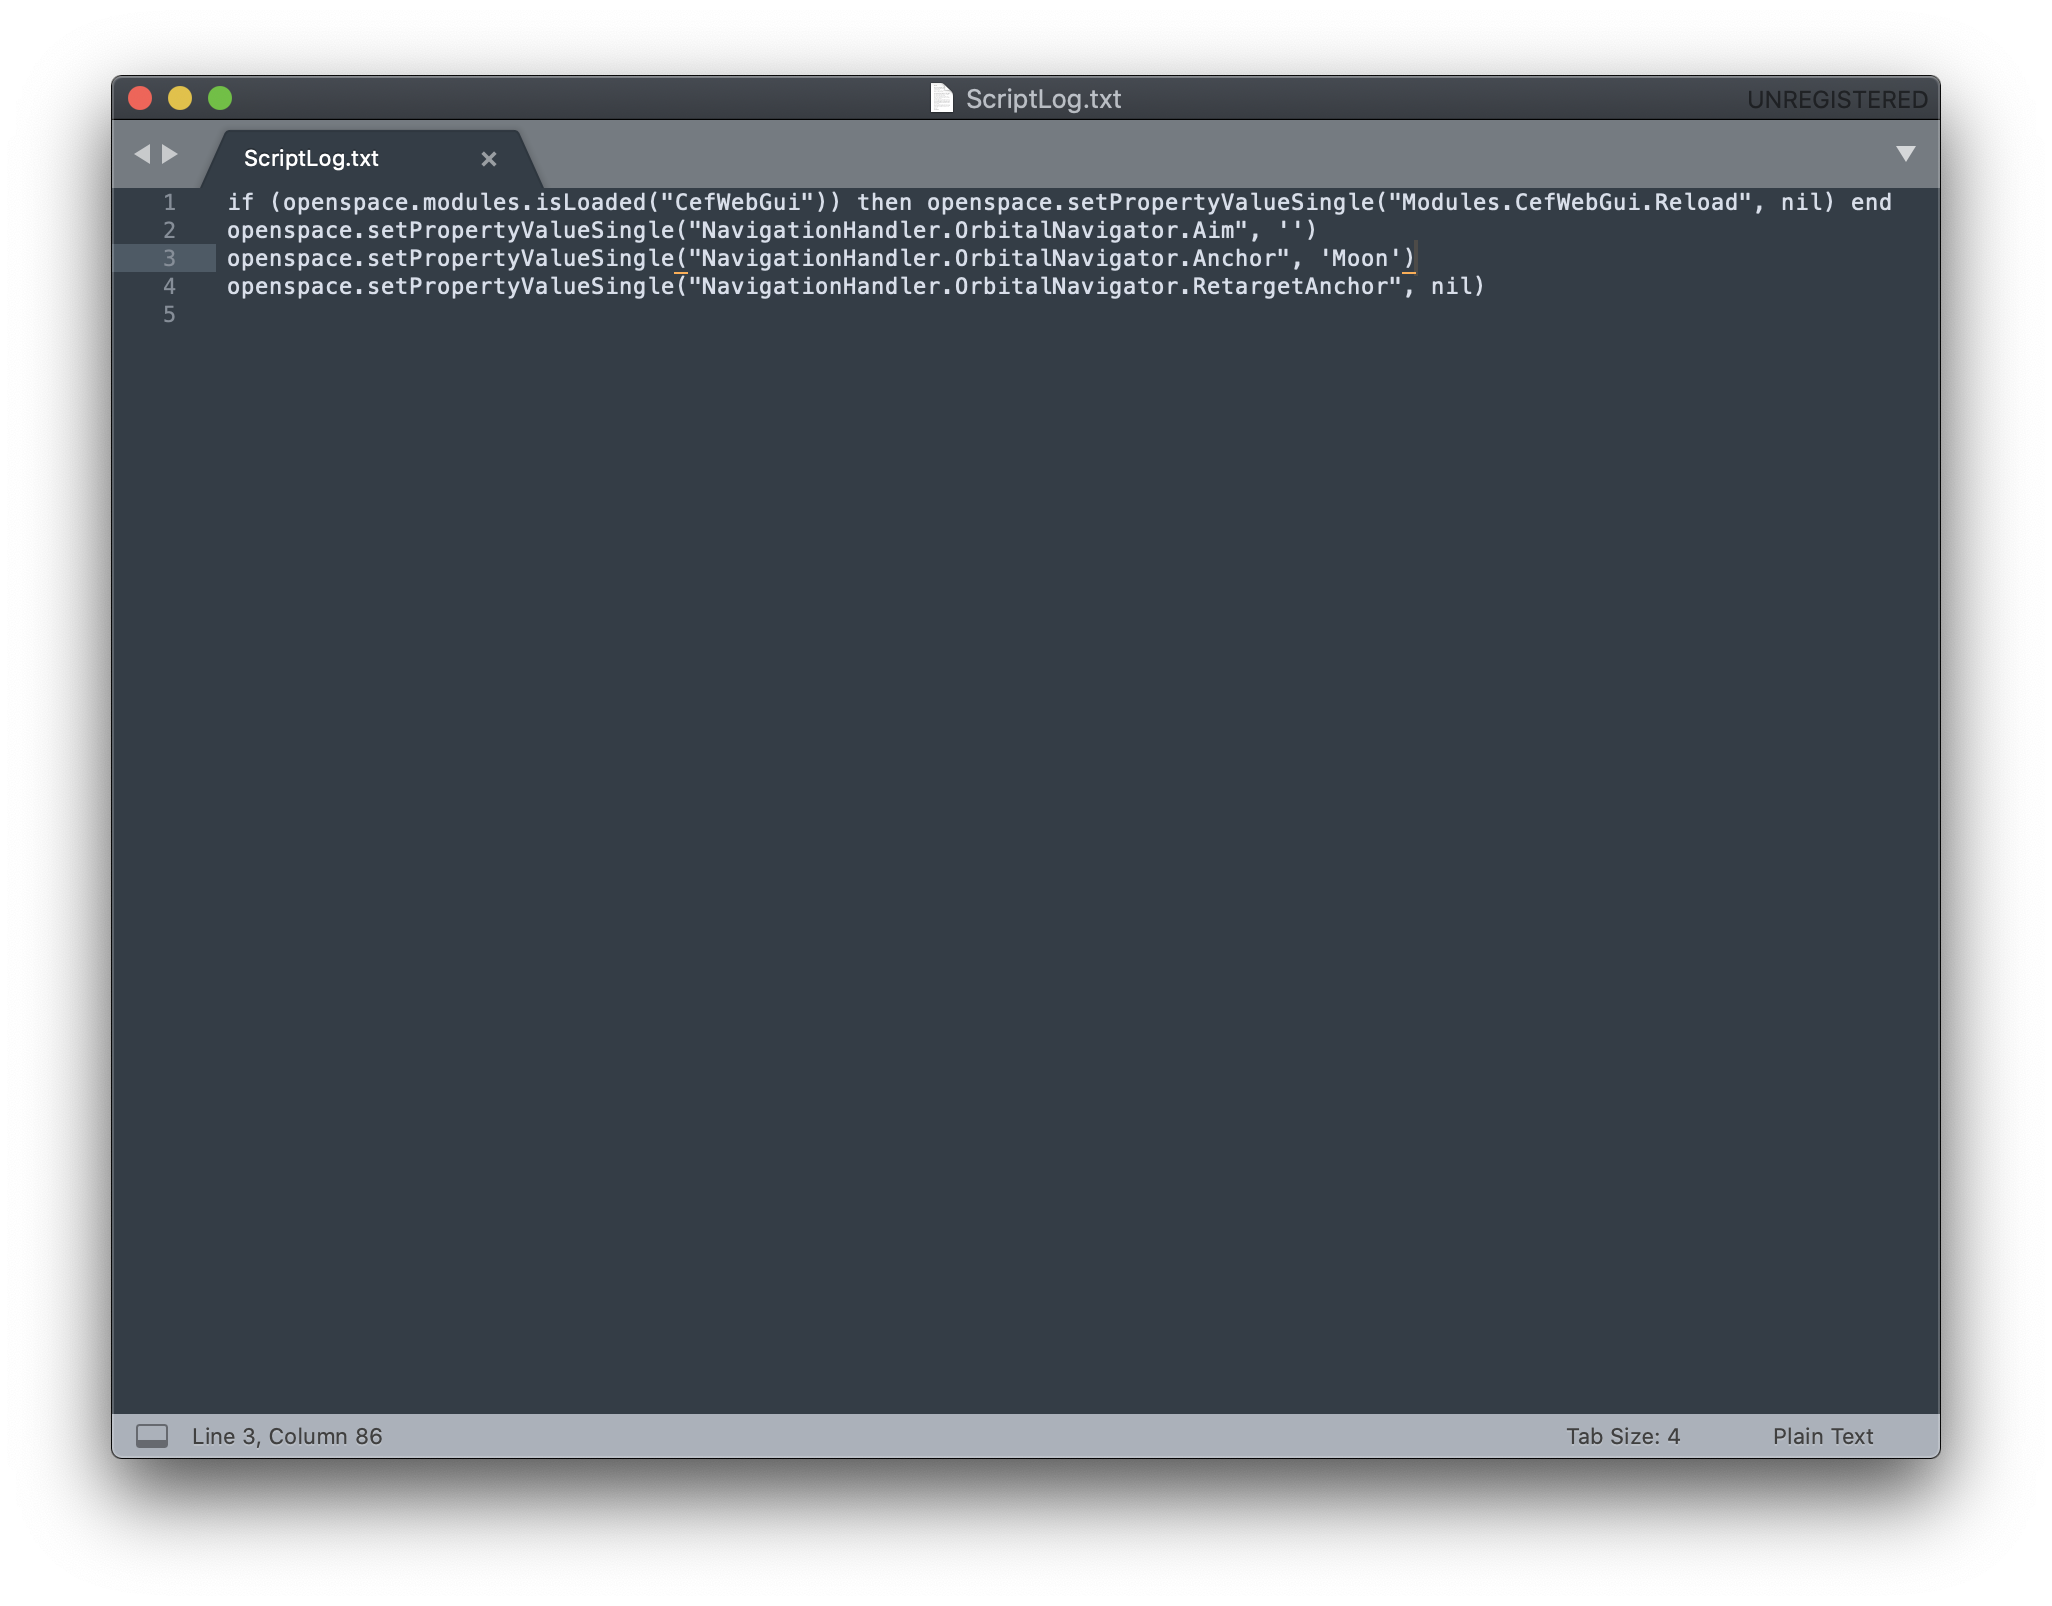
Luckily, the 0.14.1 build of Open Space has a great log file that tracks all of the LUA code that runs when the user takes any action in Open Space. The javascript library that Micah and his team have been working on allows you to hook fairly easily between Open Space and the web interface, if you know what the LUA code was. Here’s what the log file looks like after I retargetted to the Moon:
Based on this knowledge, and Micah’s helpful code, I forked Open Space’s current build from the Github, added Micah’s web UI code, and then made adjustments to that code to add time and video capture features to the web UI while removing buttons related to actions I did not want to focus on. My specific additions to the fork are viewable here.
My contributions to the web UI have been quite modest so far:
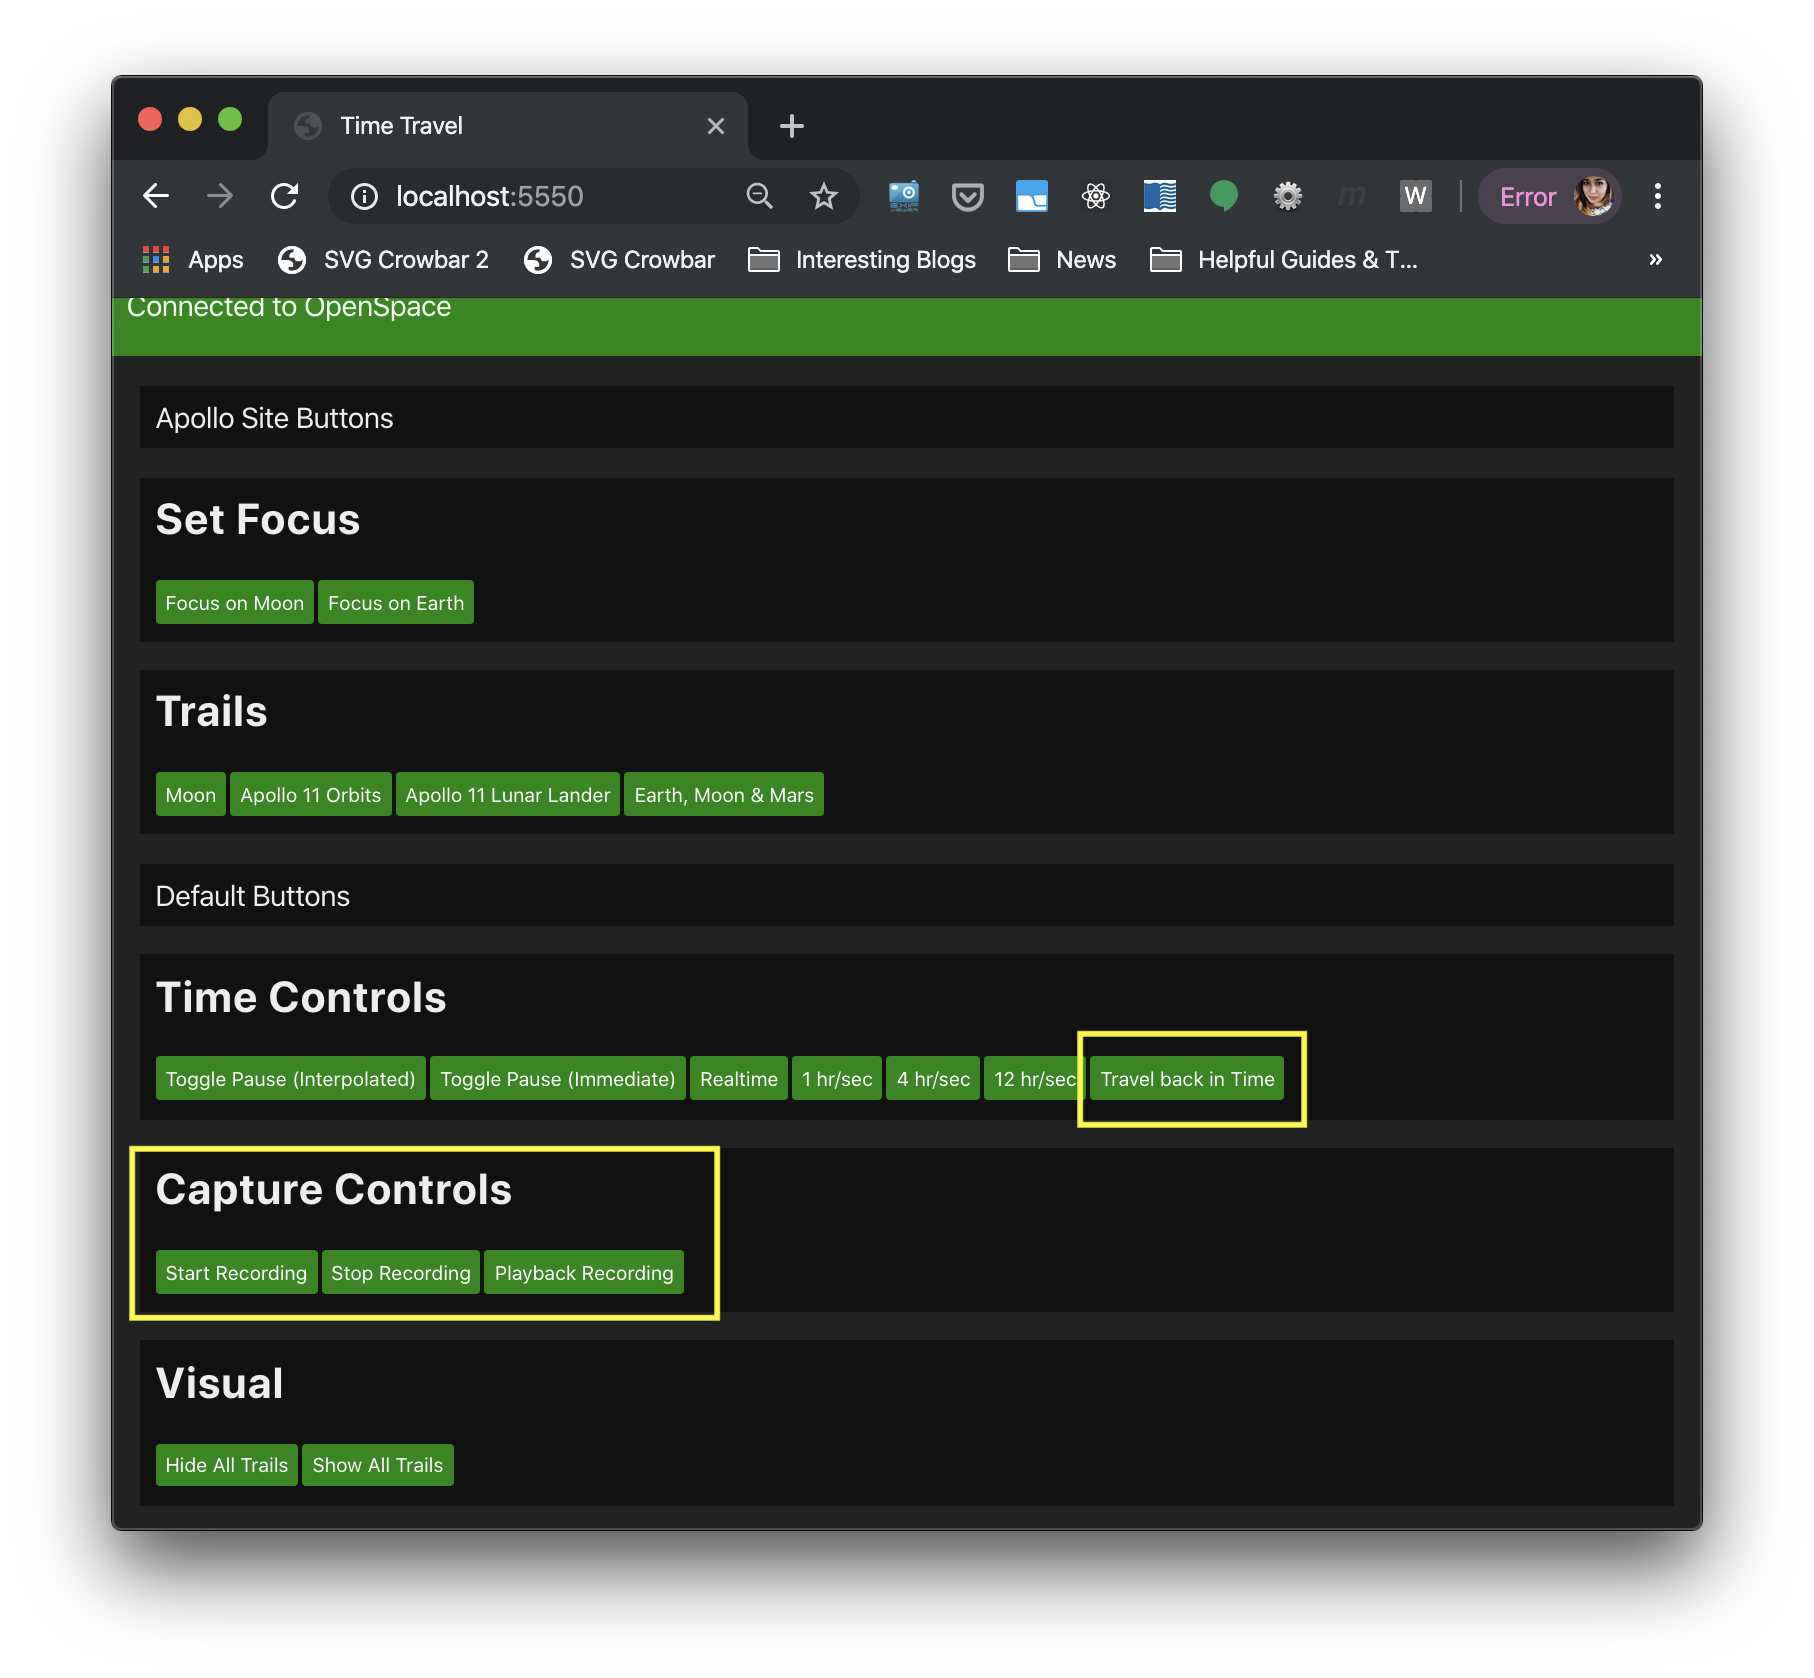
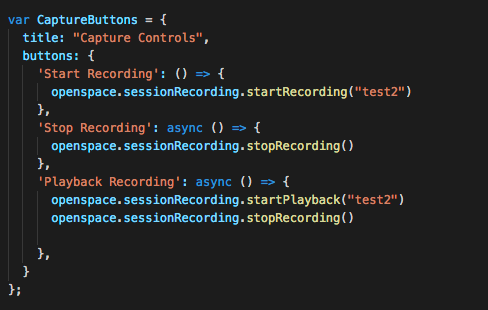
My code for the capture buttons looks like:
Now that I have a basic understanding of this workflow, it would be interesting to load in additional mission data and build of out web interface to navigate that data. A more robust feature for the web UI would be the ability to add 3D objects and data to Open Space to build out an entire scene (rather than simply move around an existing scene).
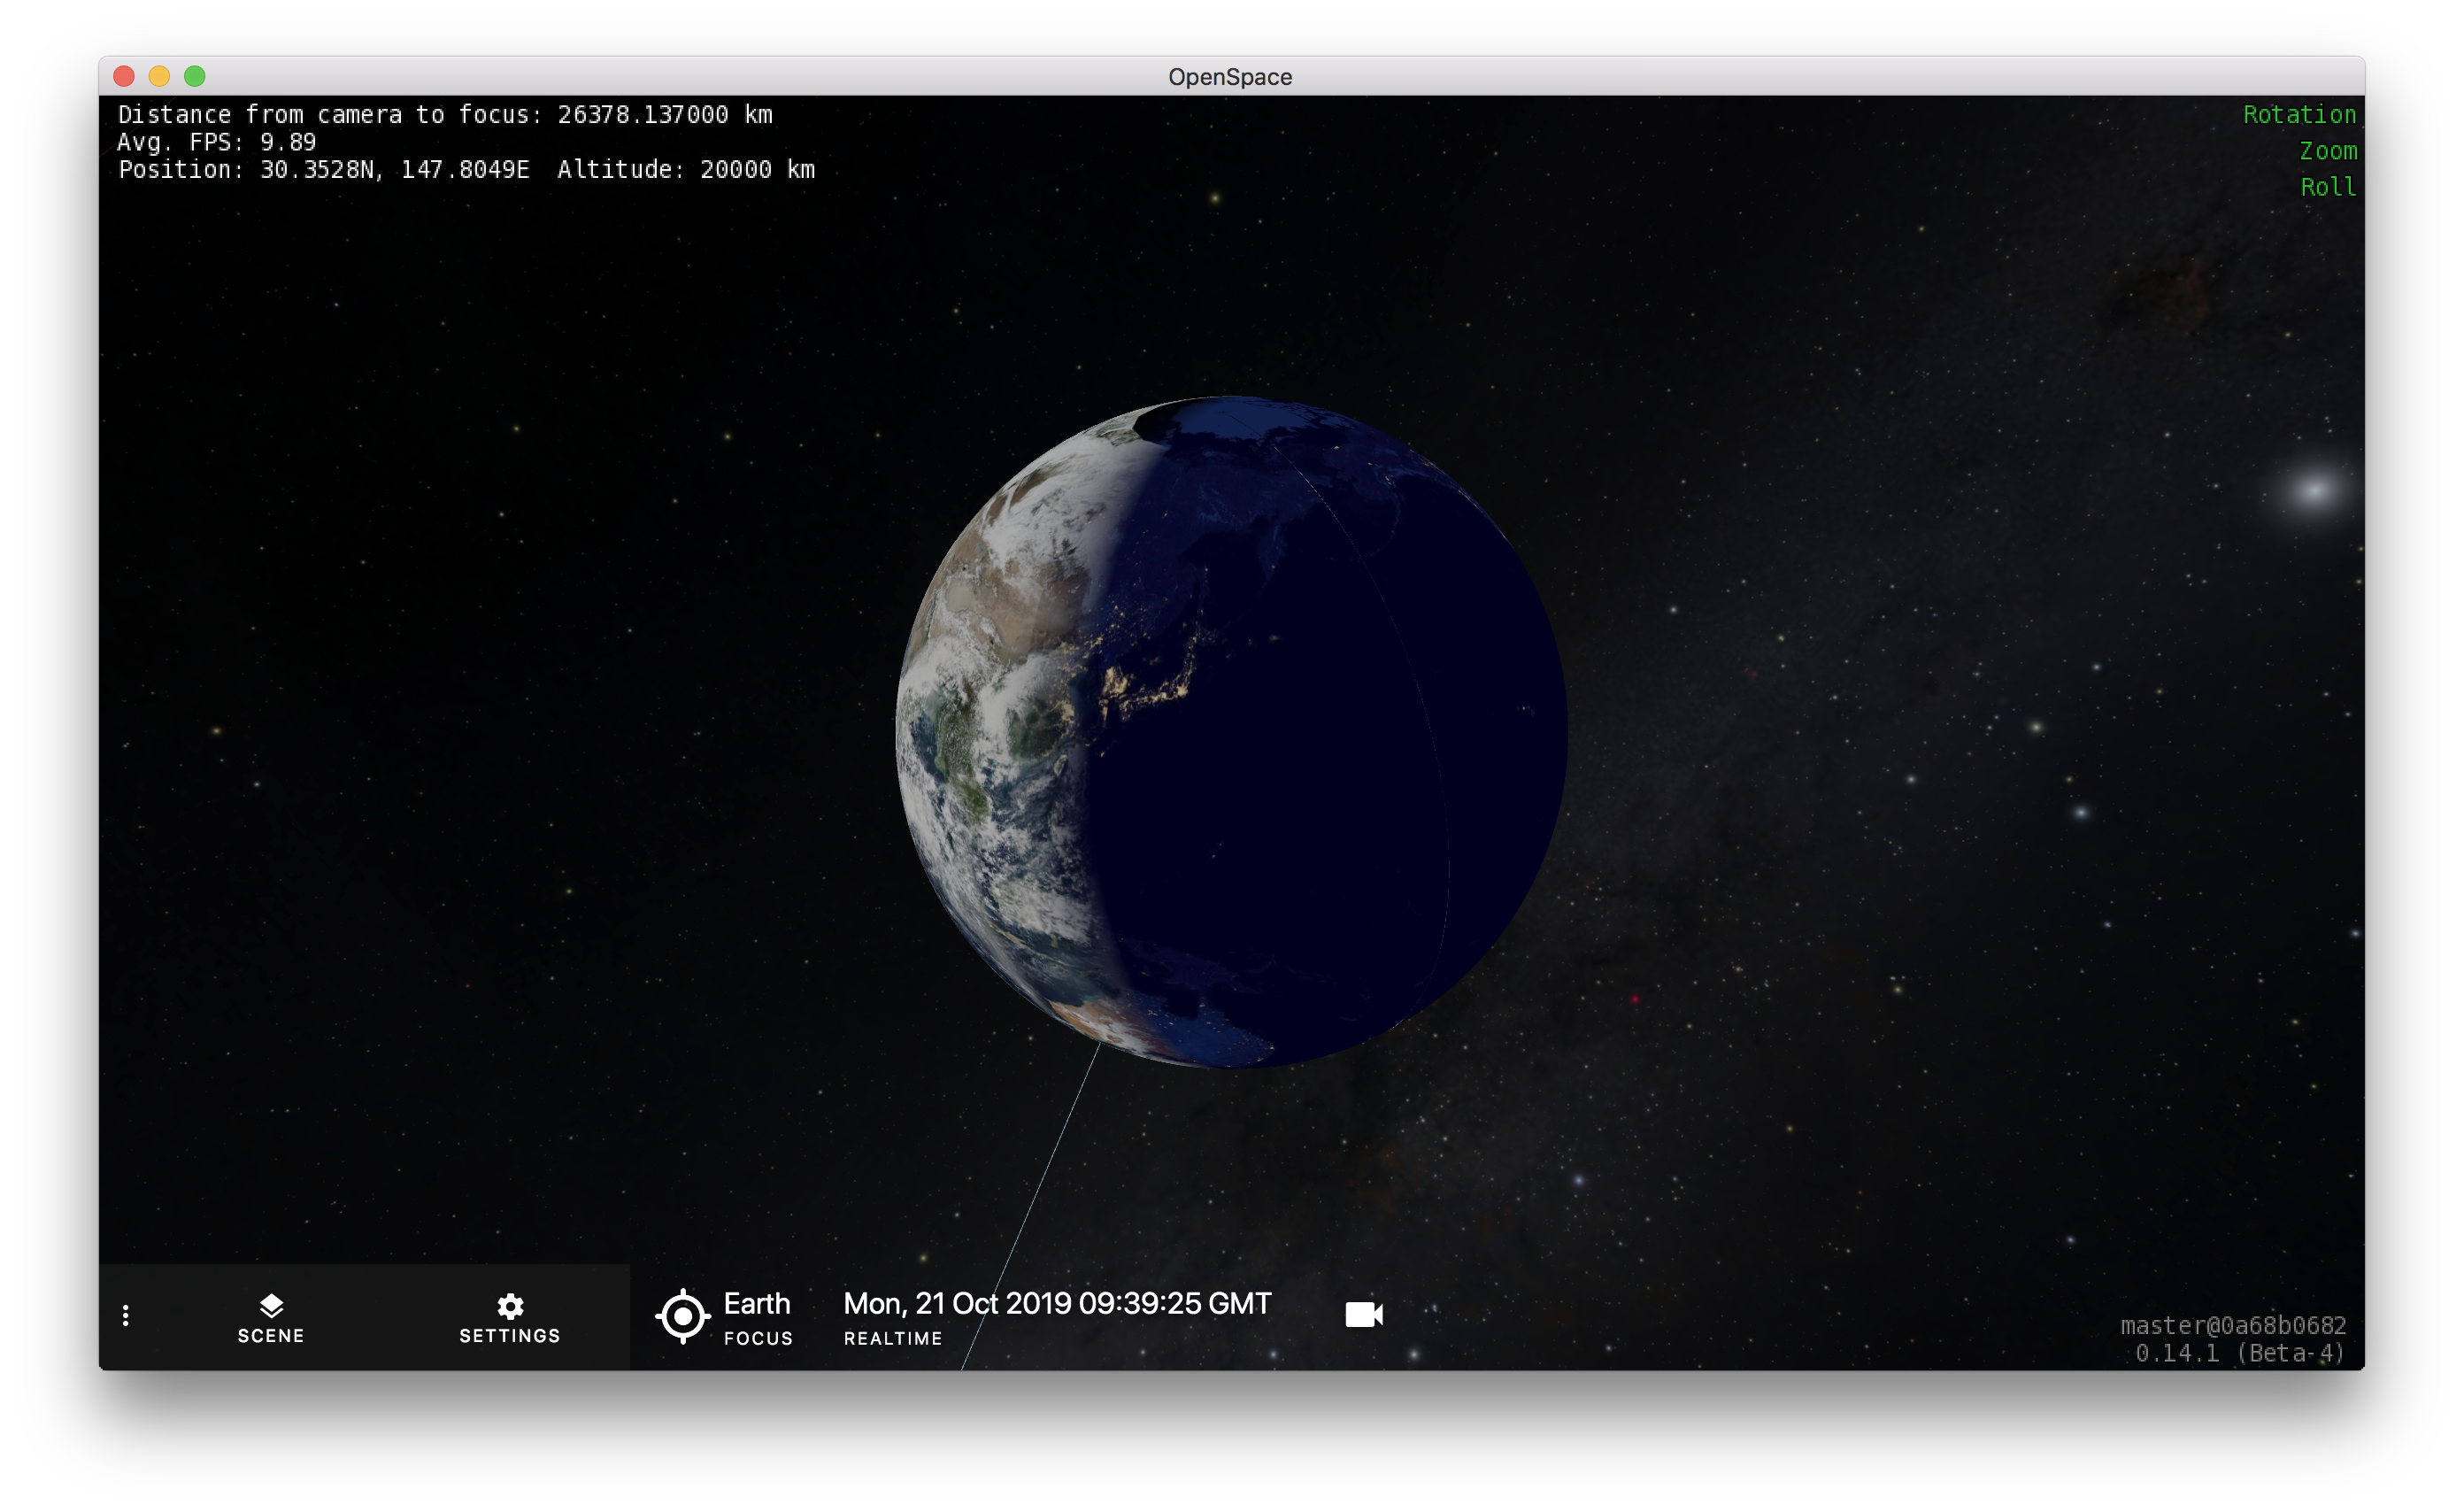
This is what a very basic scene looks like:
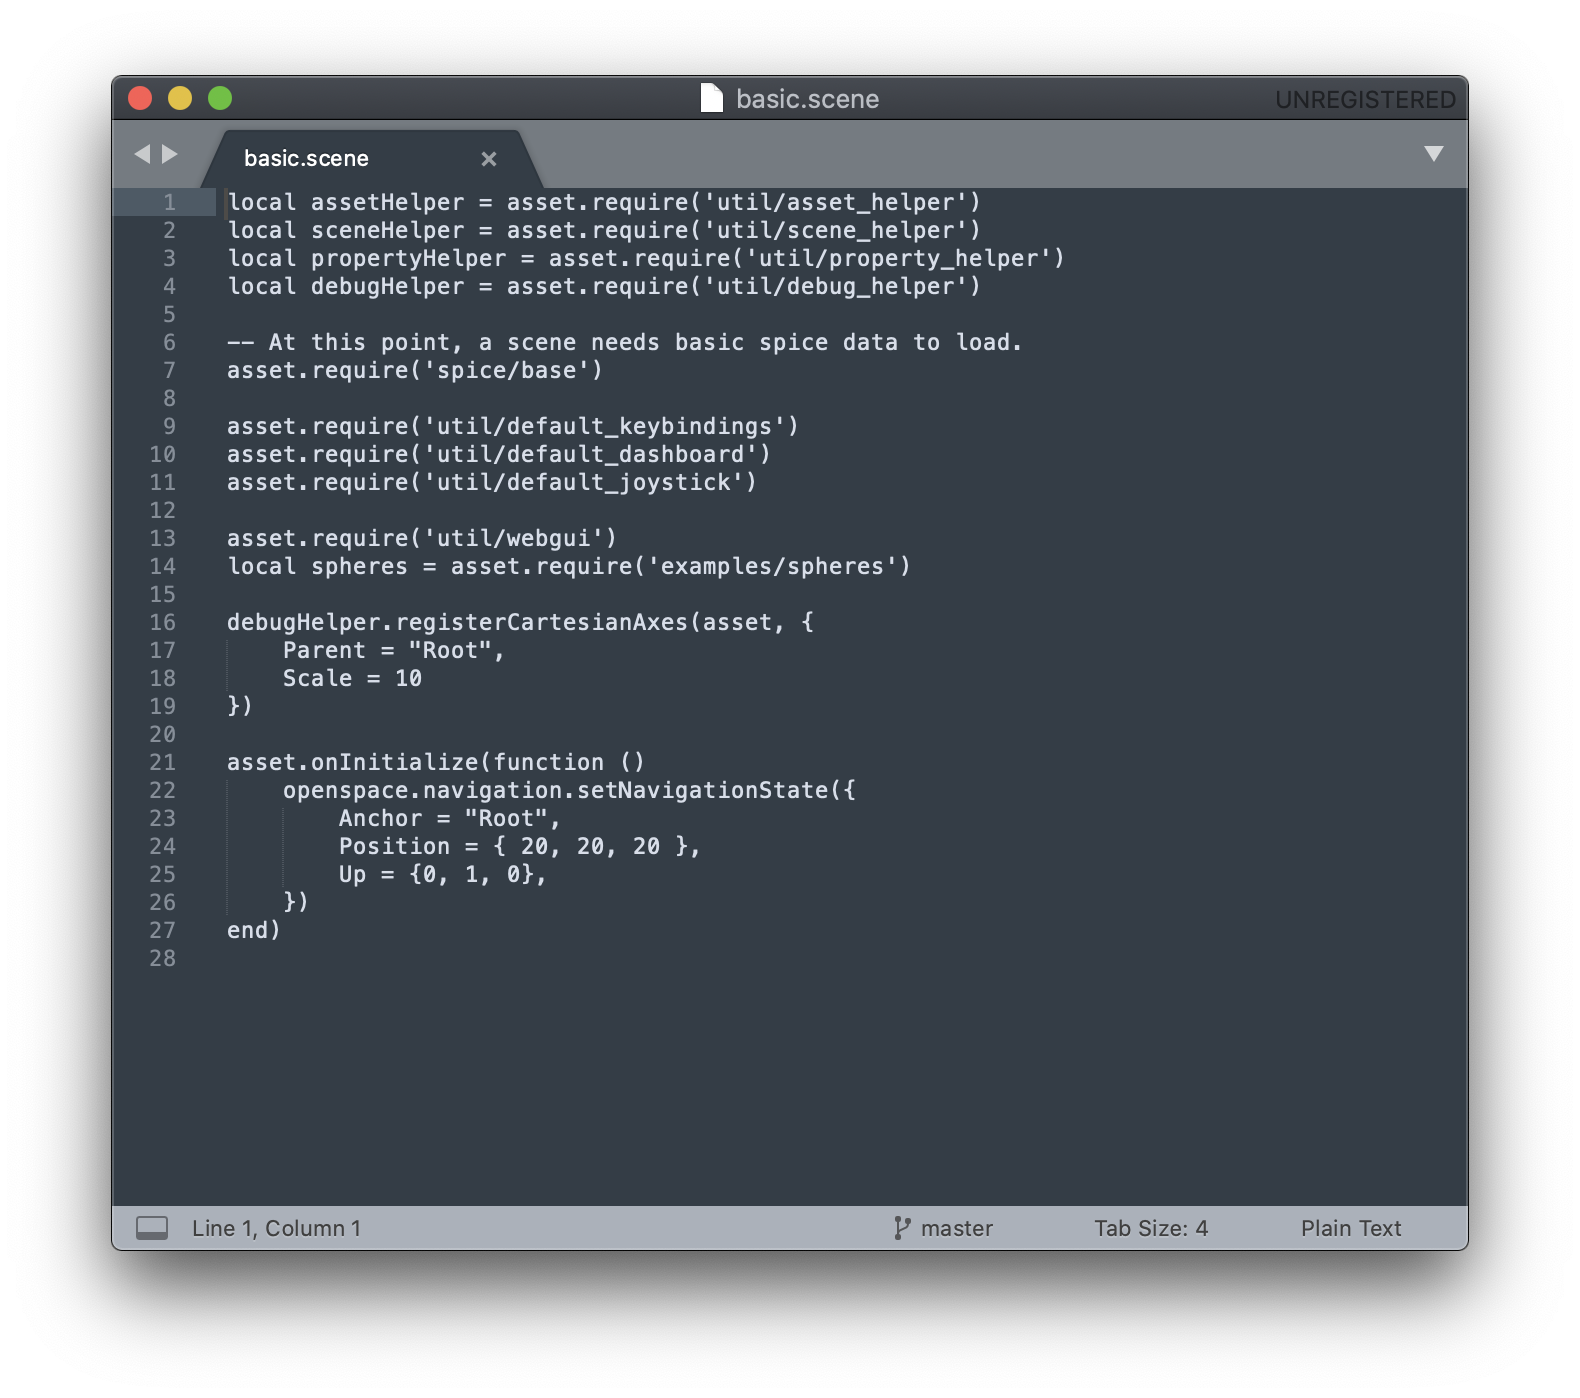
In order to create my own scenes, I would need to download SPICE data from NASA (using an existing Python library), and create my own scene file for Open Space. When you first load Open Space, it loads a file called “default.scene” located under “/data/assets”. To create my own scene, I would likely based it on this file and the basic.scene file from above. And again, I can use the log file to see what happens when I load existing scenes into Open Space (and use that information to load my own).
I feel like what I achieved for the midterm was a few new web UI features, but more importantly, a robust understanding of how I could modify Open Space. Ideally, I would like to keep working on this project for my final, though I would love some help in figuring out how to weave some of the concepts we’ve been talking about in Time and making them more apparent in what I build for this program. (Time in Open Space, and in NASA data itself is pretty rich topic, so perhaps the deliverable can be some part technical, some part explanatory).
To-do list for final
- Make the Web UI friendly (not just buttons!)
- What interface would make sense for staff running planetarium shows?
- What interface would make sense for LES Girls Club students learning more about our solar system?
- Can they load their own data, textures, or creative images easily into Open Space?
- Grab new SPICE kernels for Open Space:
- Add a new scene to Open Space from newly acquired SPICE data (using the scene structure described above)
- Connect with Micah again to understand their development needs
- Stretch: coordinate with image processing “space artists” to load new textures into open space.