I have returned after a too-long silence! Sometimes it’s easier to get things started again with a simple project, and for that, I thought I’d try my hand at a very simple animation.
The video went into how we turn on rigid-body physics in Blender (honestly, somewhat similar to Unity), and how to keyframe animation for both movement and color. The keyboard short to add a keyframe is i, and I learned from another video that you can even animate “manually” by moving things around in your viewport, if you have auto-keying turned on. Wild stuff! (That video is here.)
The end result of today’s Blender adventure is here:
My dream is to animate some blobby figures, so maybe we’ll try that tomorrow.
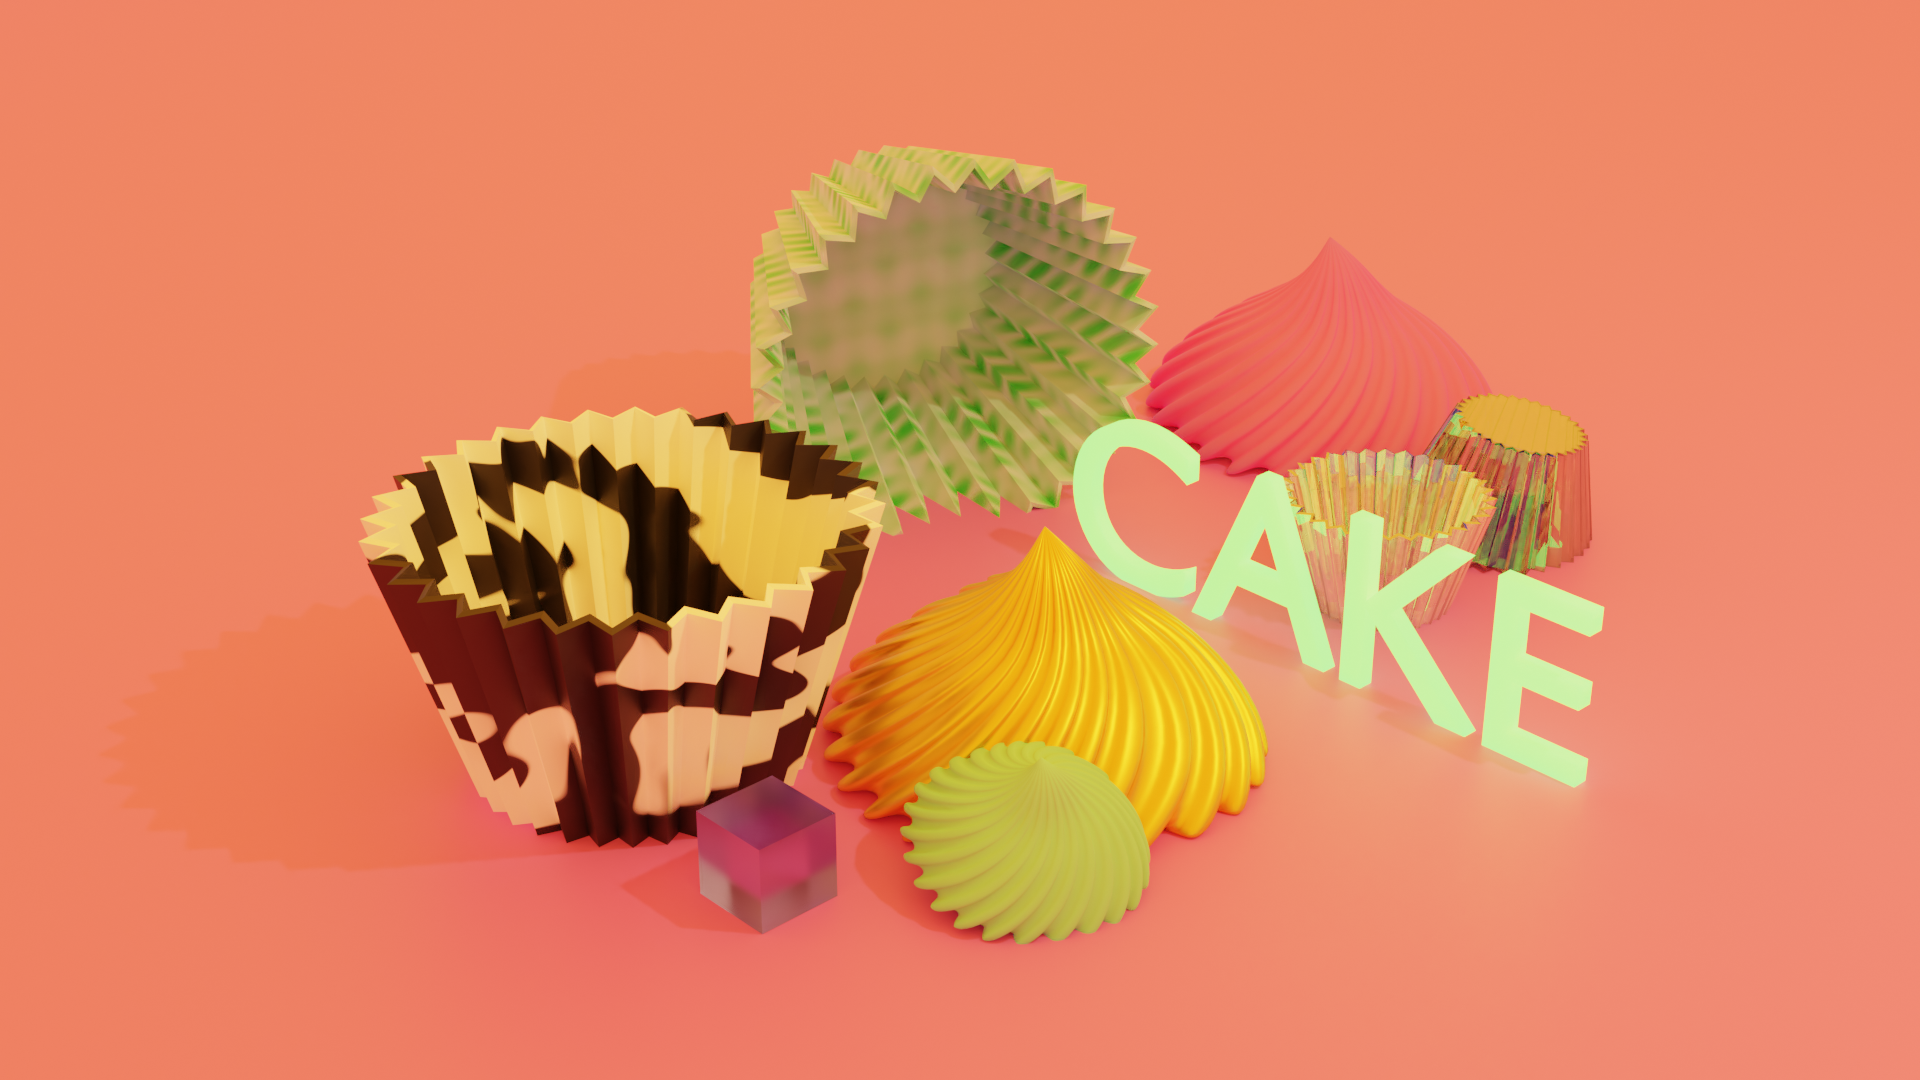
Spent another day playing around with materials, forms, and lighting. I revisited the tutorial for the cupcake to remember how to make the wrapper and the cream, which definitely highlighted just how much I forgot in just a few days ago. Hopefully, repetition and an increasing familiarity with the tools will make that easier in time.
You can tell I had a lot of fun with emissions in this. My major lighting source is actually a gigantic plane with an emission shader. Fun!
This was also my first time dabbling with the text feature, and I could not for the life of me find the extrude settings (it was under “Geometry” in Text Properties).
A few items I want to highlight after revisiting the cupcake tutorial:
The mirror modifier is so great for making regular, but interesting forms.
f lets you fill in a face if you have a loop of vertices selected (alt + LMB)
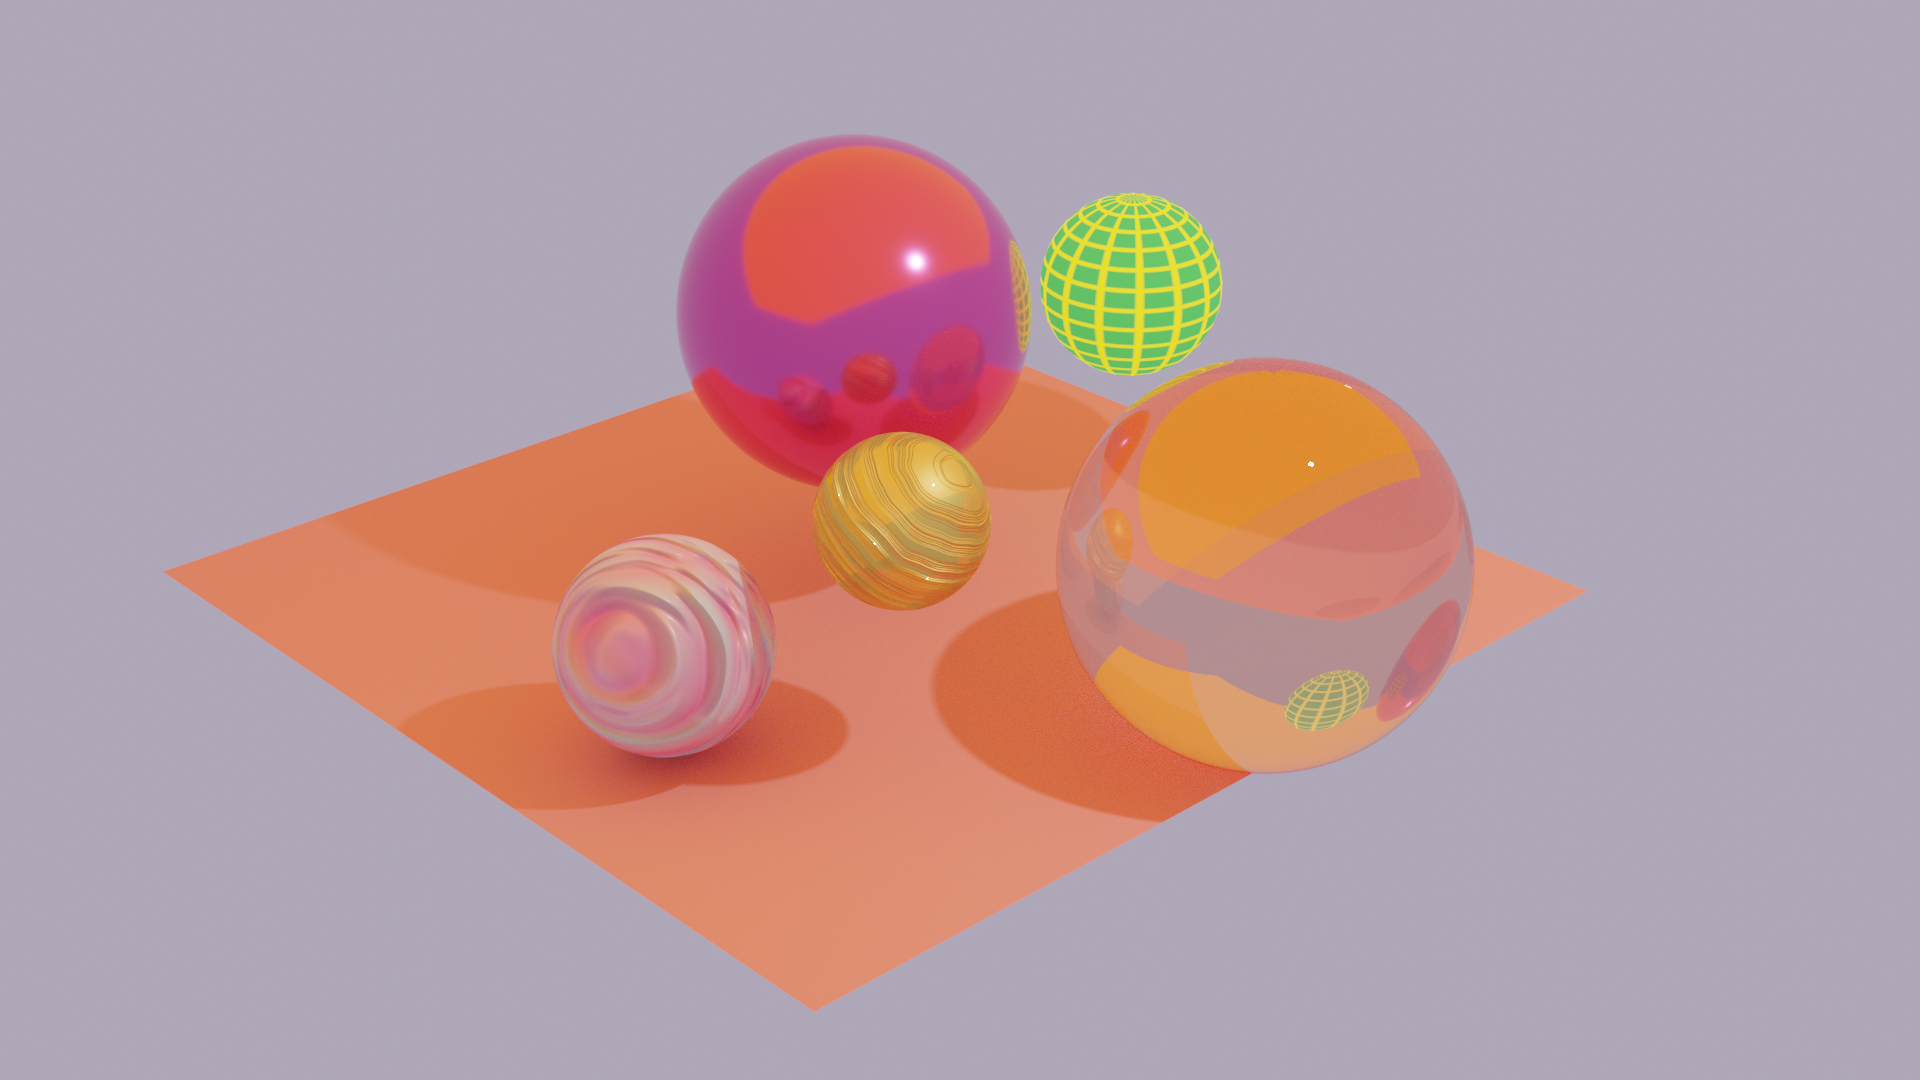
Had a ton of fun just playing around with materials today, looking at these (1, 2) two tutorials. They go over some of the good-to-know nodes for creating cool materials in the shader editor.
Here was my final product today:
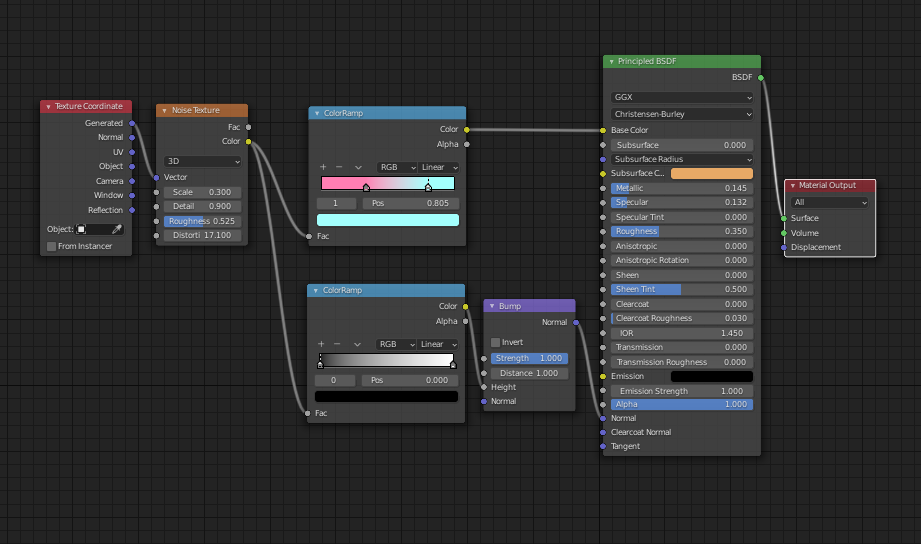
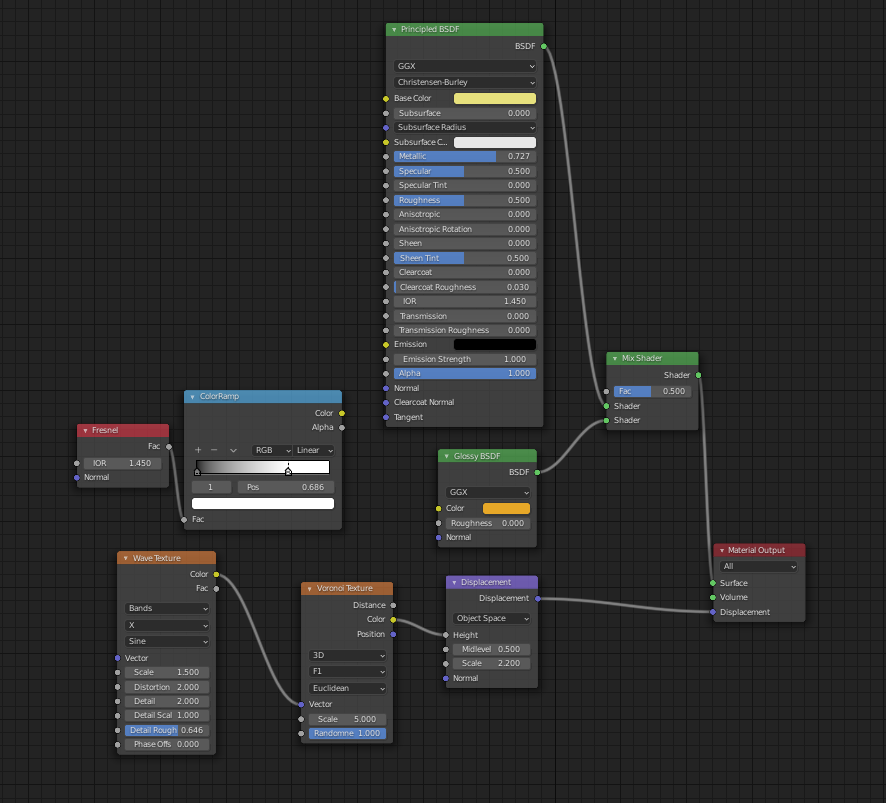
This was my material setup for the white and pink candy:
And the gold:
I’m might drop in some notes on those nodes later this week.
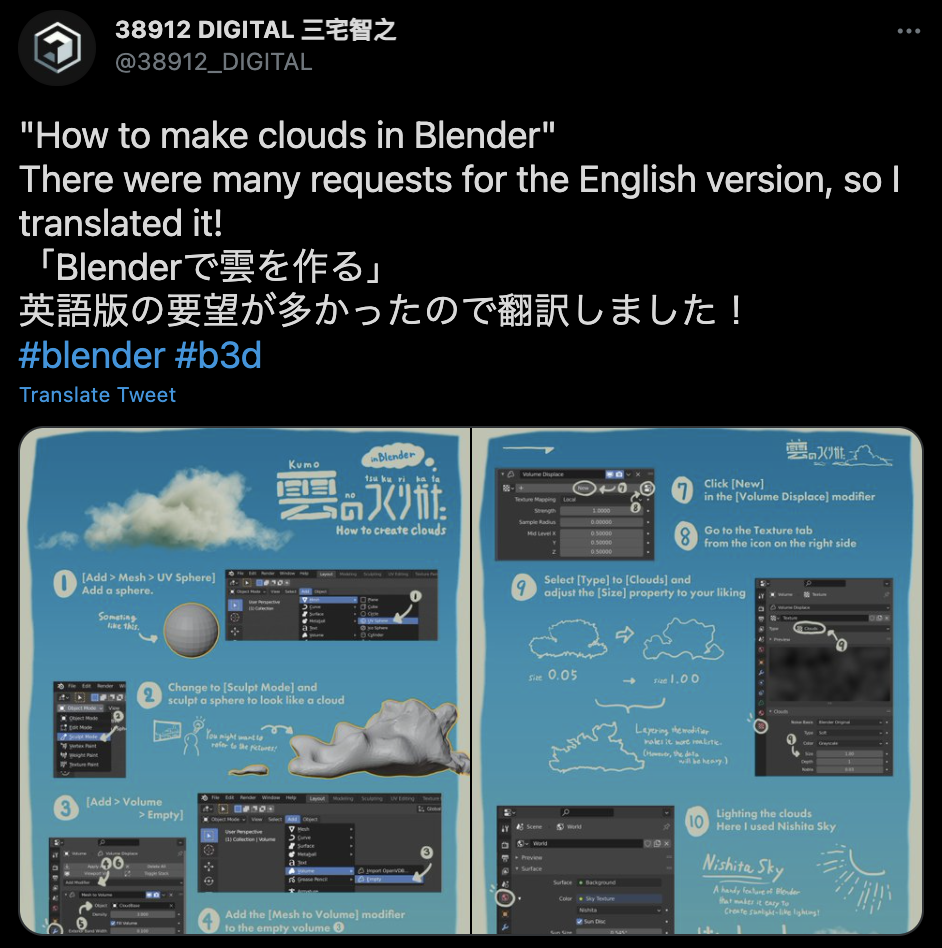
I wanted to try something I encountered on Twitter today (lol). Came across this post that purports to give you a fast way to create fluffy clouds:
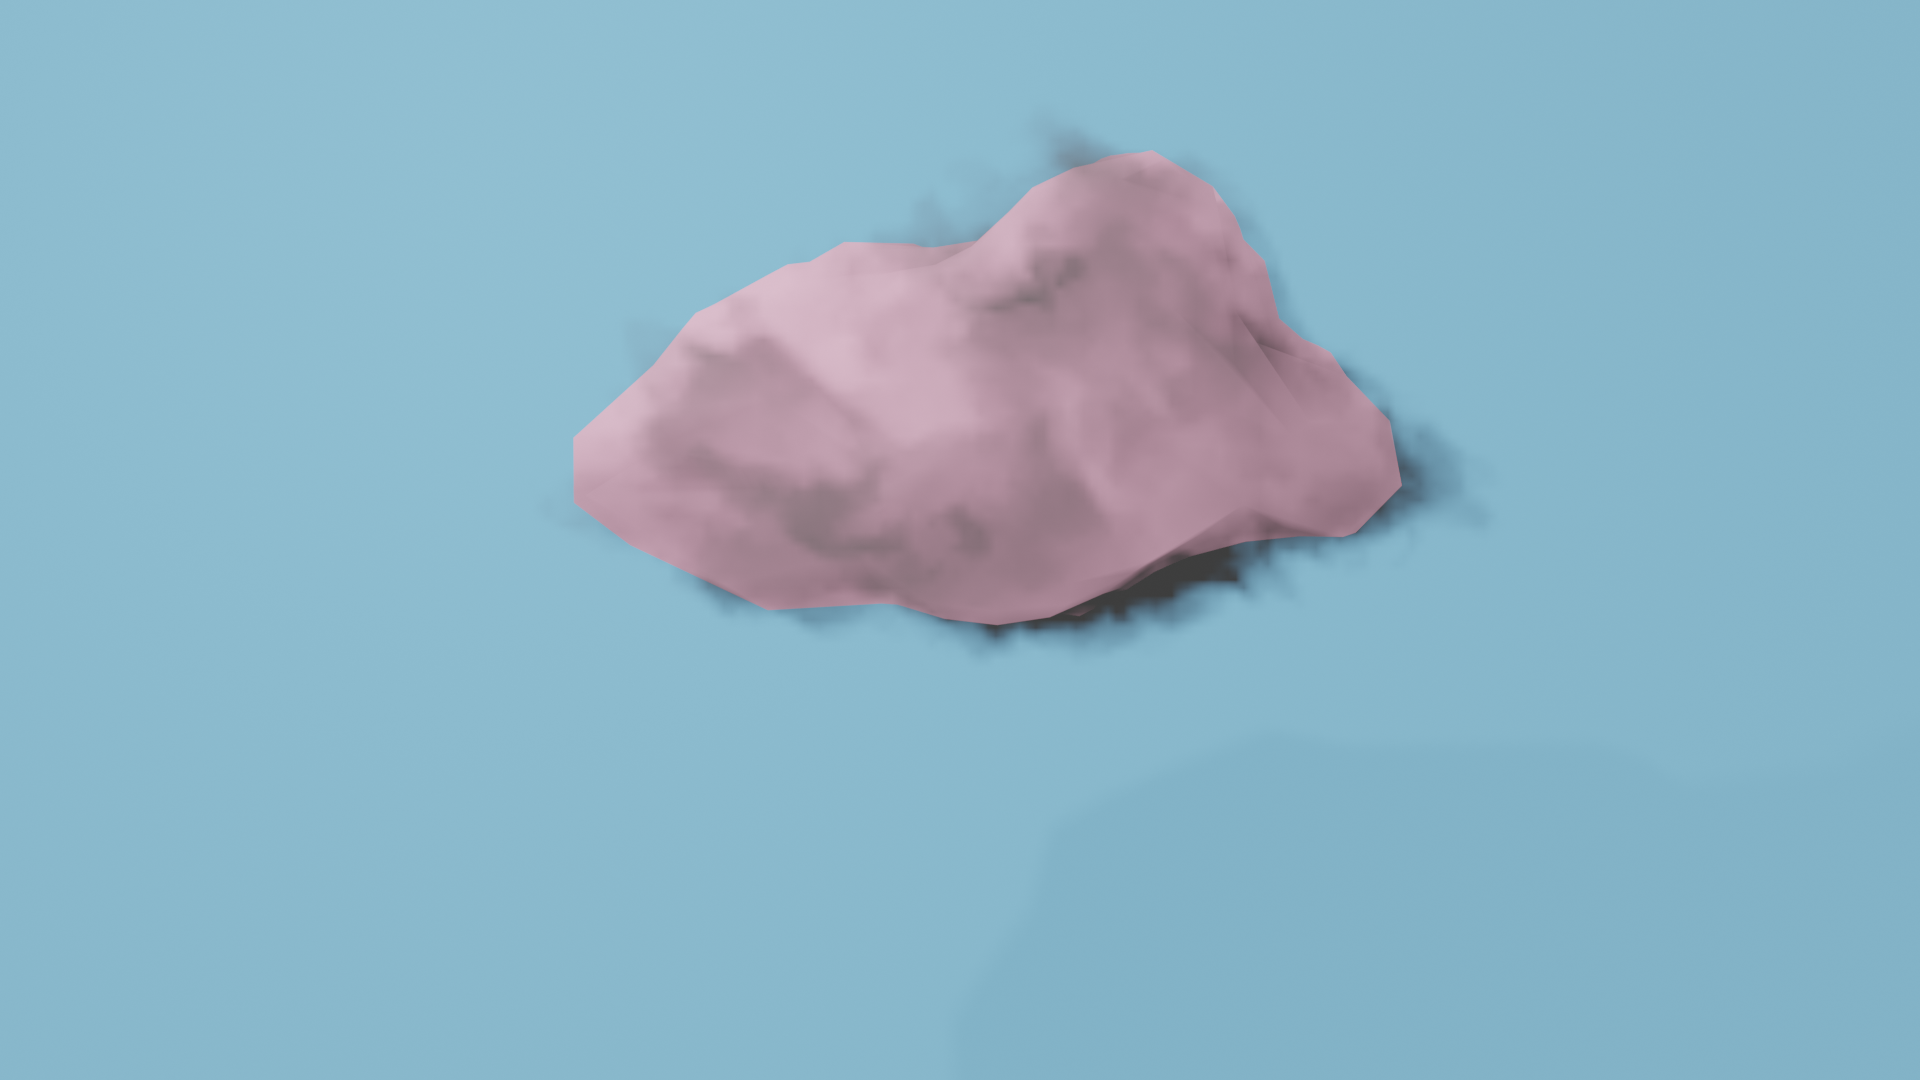
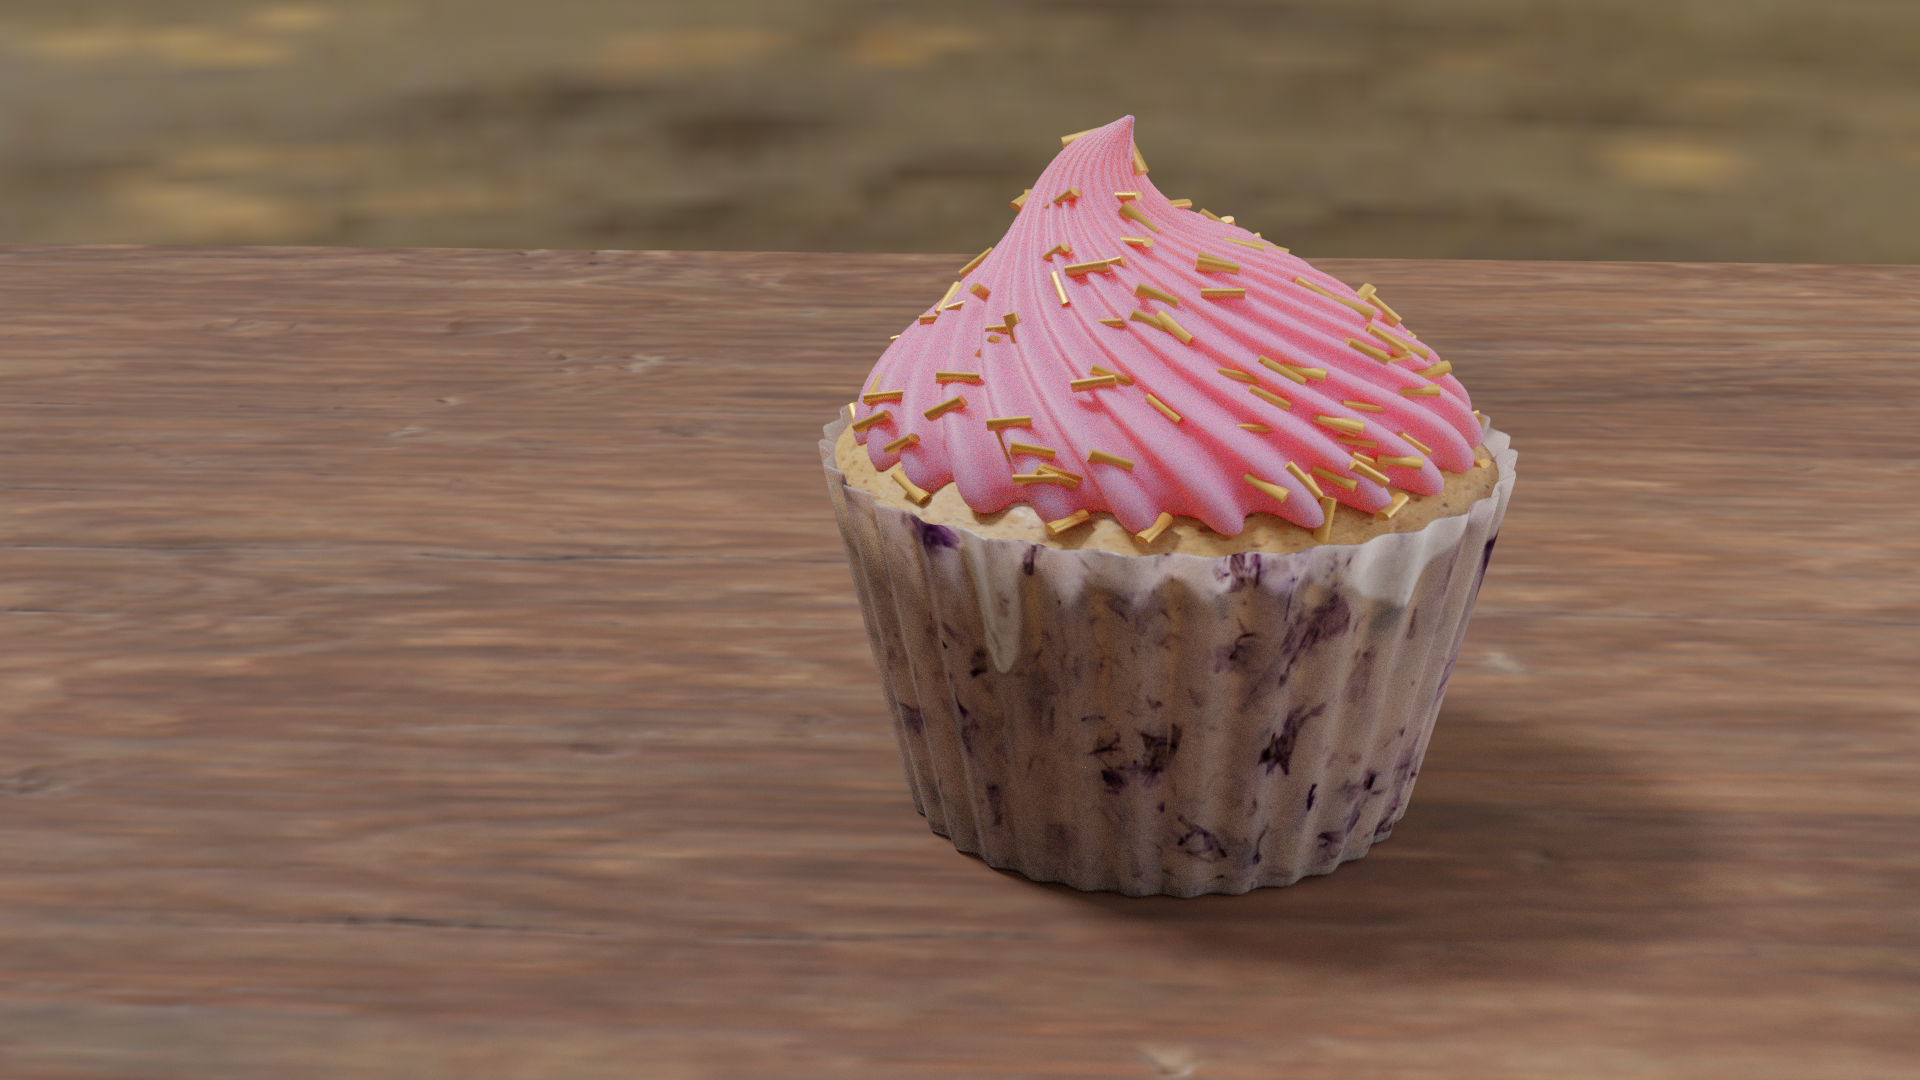
It was moderately successful, with the final product from me here:
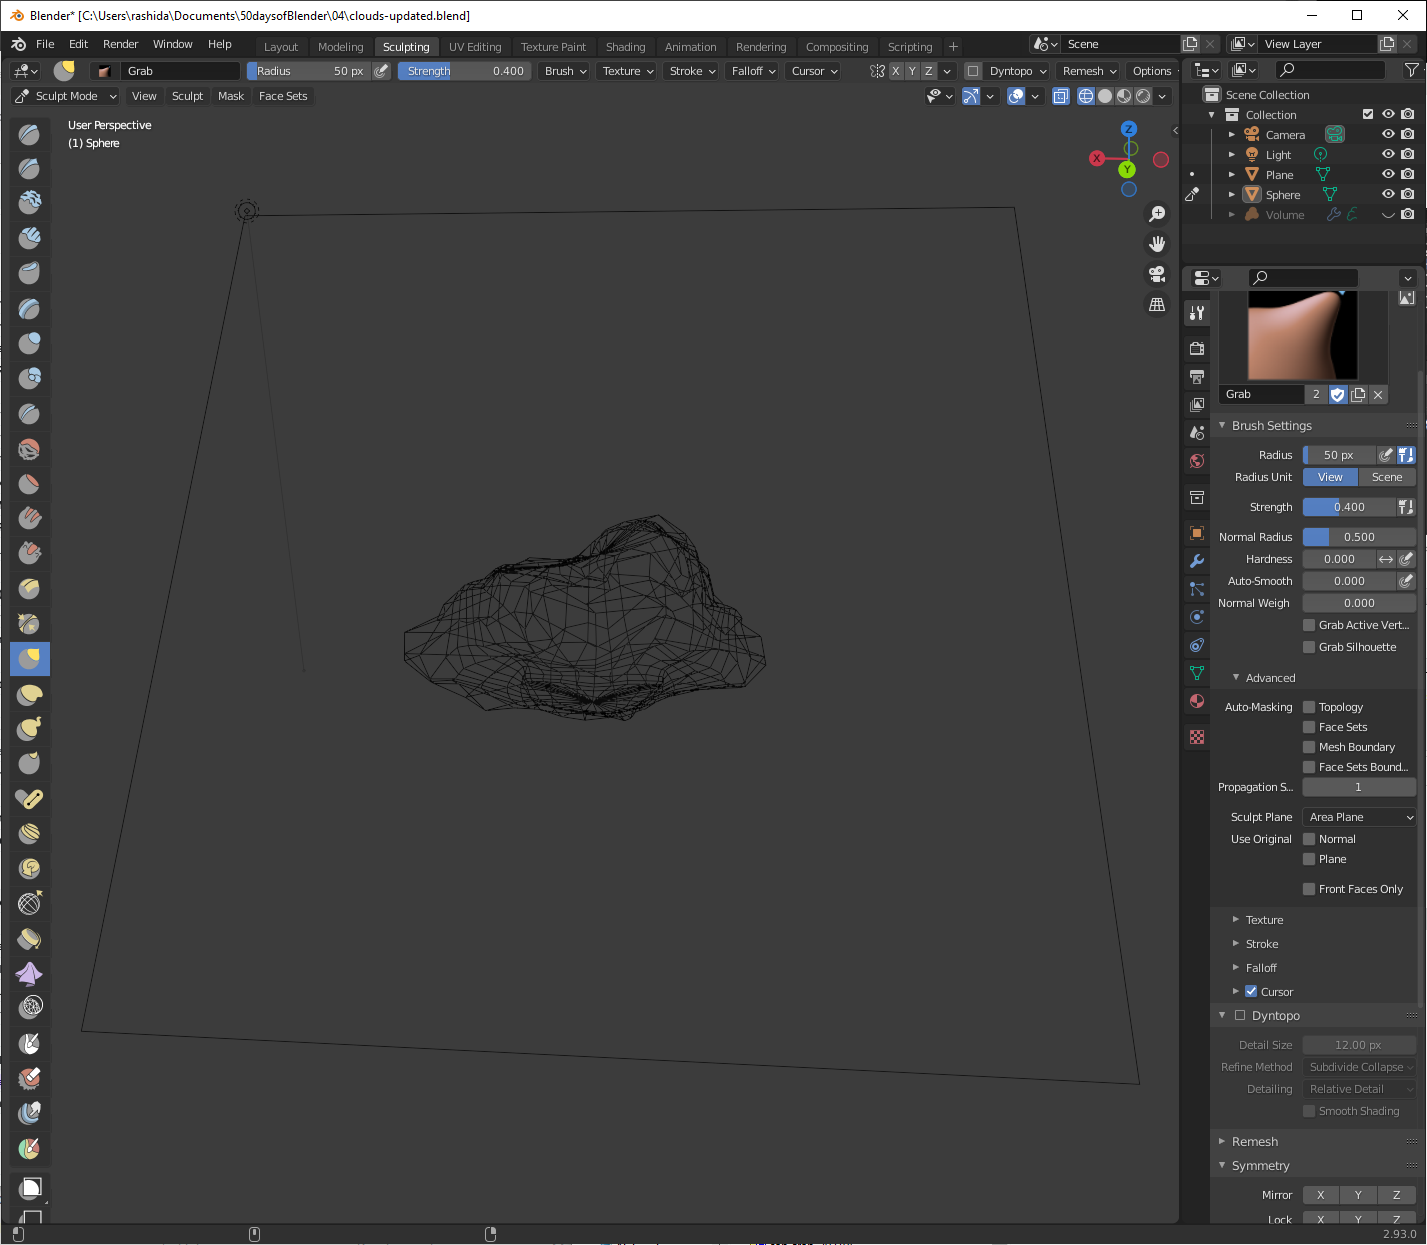
It was my first time really working with the sculpting tool. I ended up with a very familiar shape (it reminded me of an LED cloud I had made out of polyester fluff and chickwire for an old pcomp midterm):
Previously, I had done most of my modeling in “Edit” mode. For me, it felt like I was less precise with my changes in “Sculpt” mode, though it was slightly easier to produce organic shapes (especially after I had turned off mirroring).
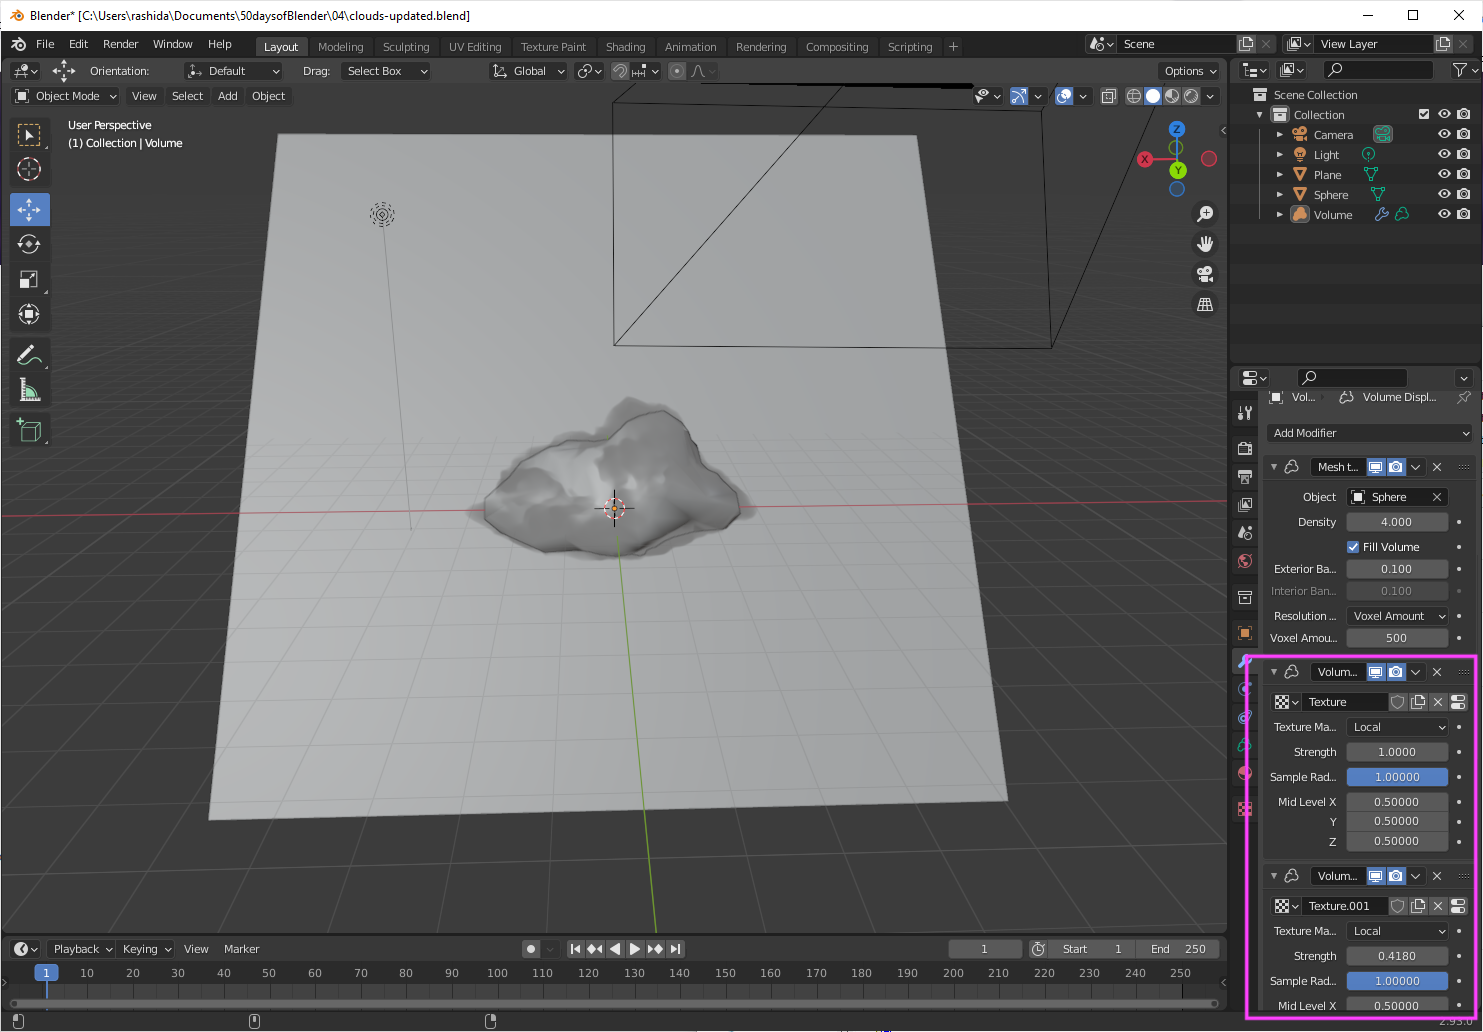
Next, this tutorial required us to use the Volume element (also new to this) to convert our mesh cloud into a volume that we could start to play with. To get increasingly a “cloudier” or fluffier look, you basically have to layer many “Volume Displace” modifiers. I was beginning to run up on the limitations of my GPU (ay, yes, there was one Blender crash), and the render time was over a couple of (excrutiatingly long, because I am baby) minutes.
I ended up layer 5+ of these modifiers for the results you see. This process seemed excessive, and I’m still on the lookout for easier ways of creating clouds…
I made this by following a tutorial by BlenderMania (part 2 to the one I posted from yesterday). The tutorial is deceptively short – it is actually jam packed with content. And it did not help that I lost all of my work on two separate occasions (1) when Blender crashed and (2) I accidentally shut down my PC.
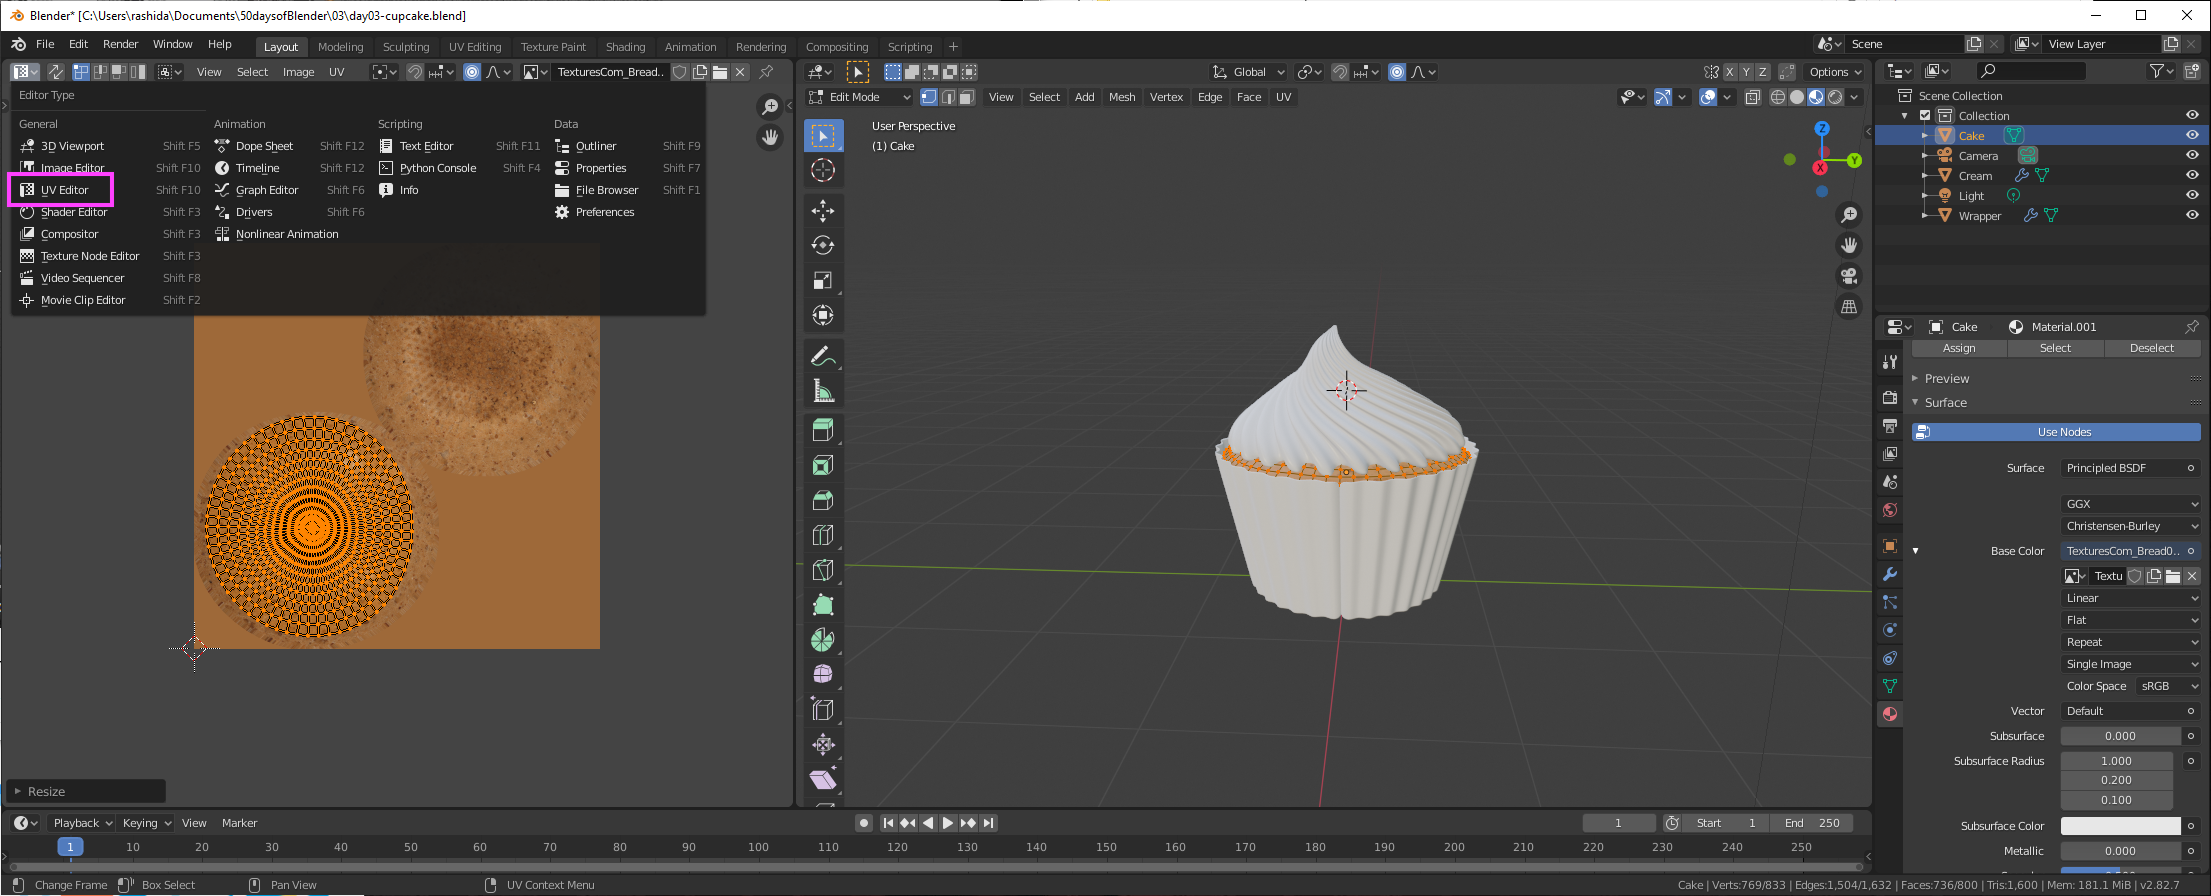
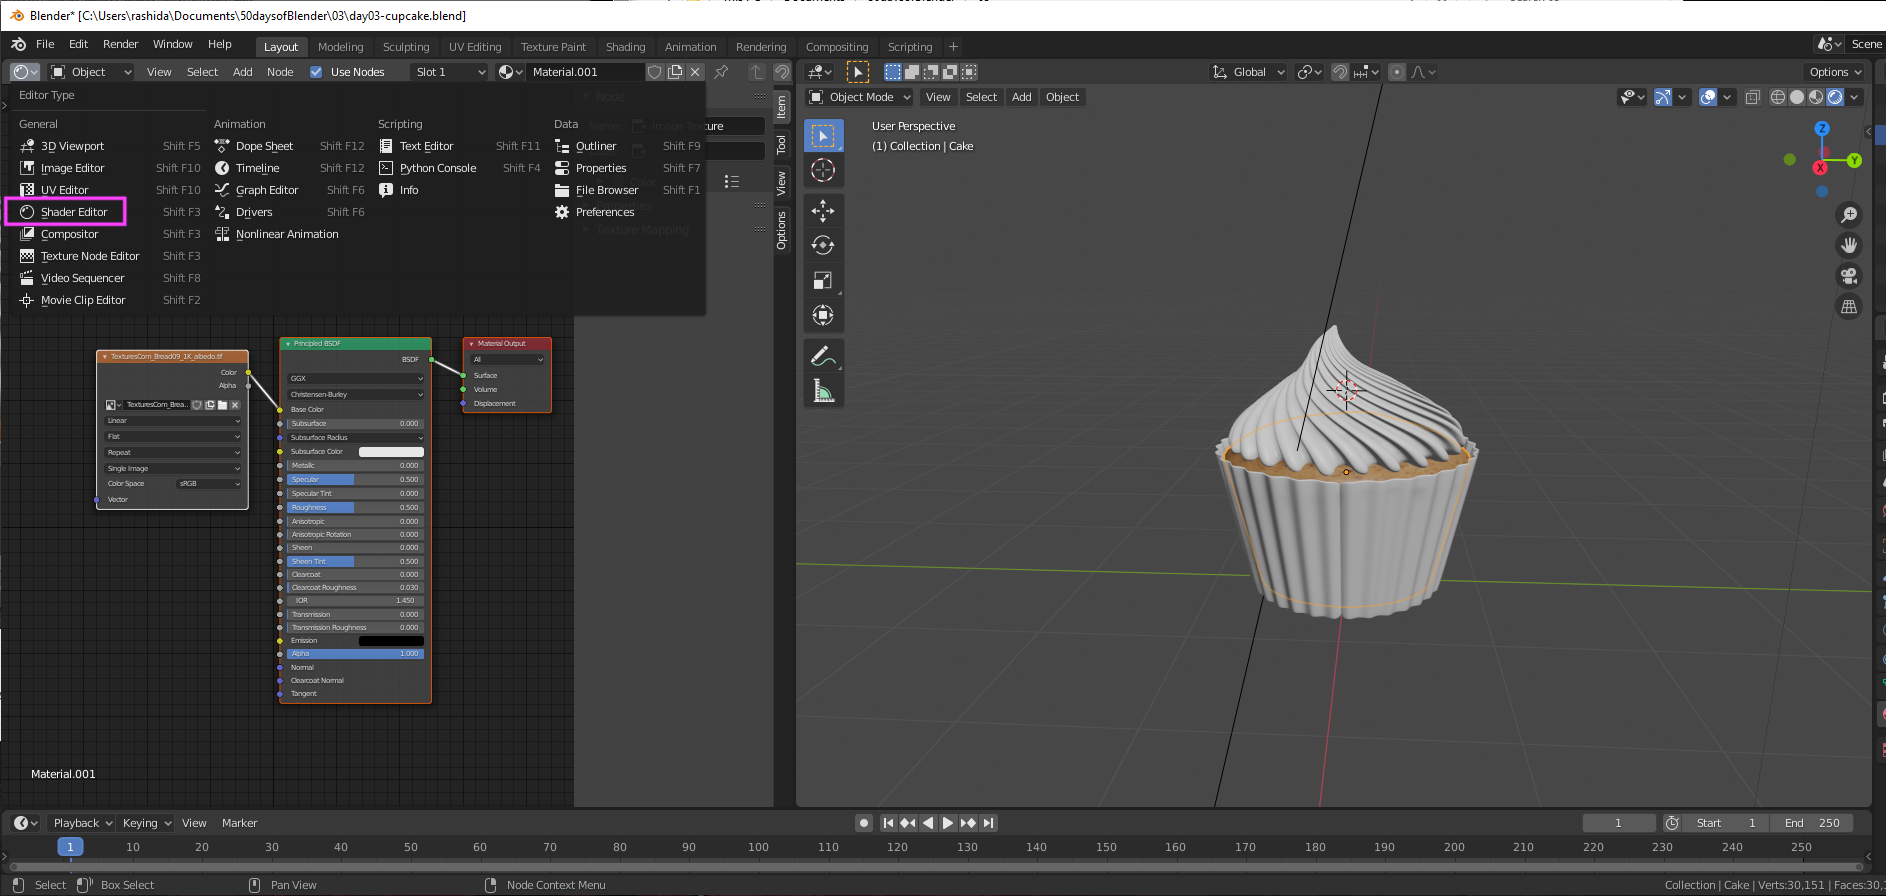
I feel some kind of way about following a tutorial that ends with me creating a work that would be quite outside my reach without step-by-step instructions. You could offer me all the bitcoin in your wallet, and I could not recreate this cupcake for you without referencing this tutorial. That being said, it did introduce me to quite a few features and possibilities in Blender that I was unfamiliar with. UV mapping and texture painting come to mind in particular. Also bringing together all that magic in the shade editor – which I was simply proud to have successfully found in the interface.
Look at me go!
Hoping to either focus on some simpler forms and compositions or revisit some forms from this tutorial for practice tomorrow.
In the meantime, some ✨keyboard shortcuts✨:
u: unwrap texture
t: toggle tools
Shift + h: hide everything but selected
Alt + h: unhide everything
Ctrl + Alt + 1NUMPAD: position camera for render (hit g to move, middle-mouse click/scroll to scale)