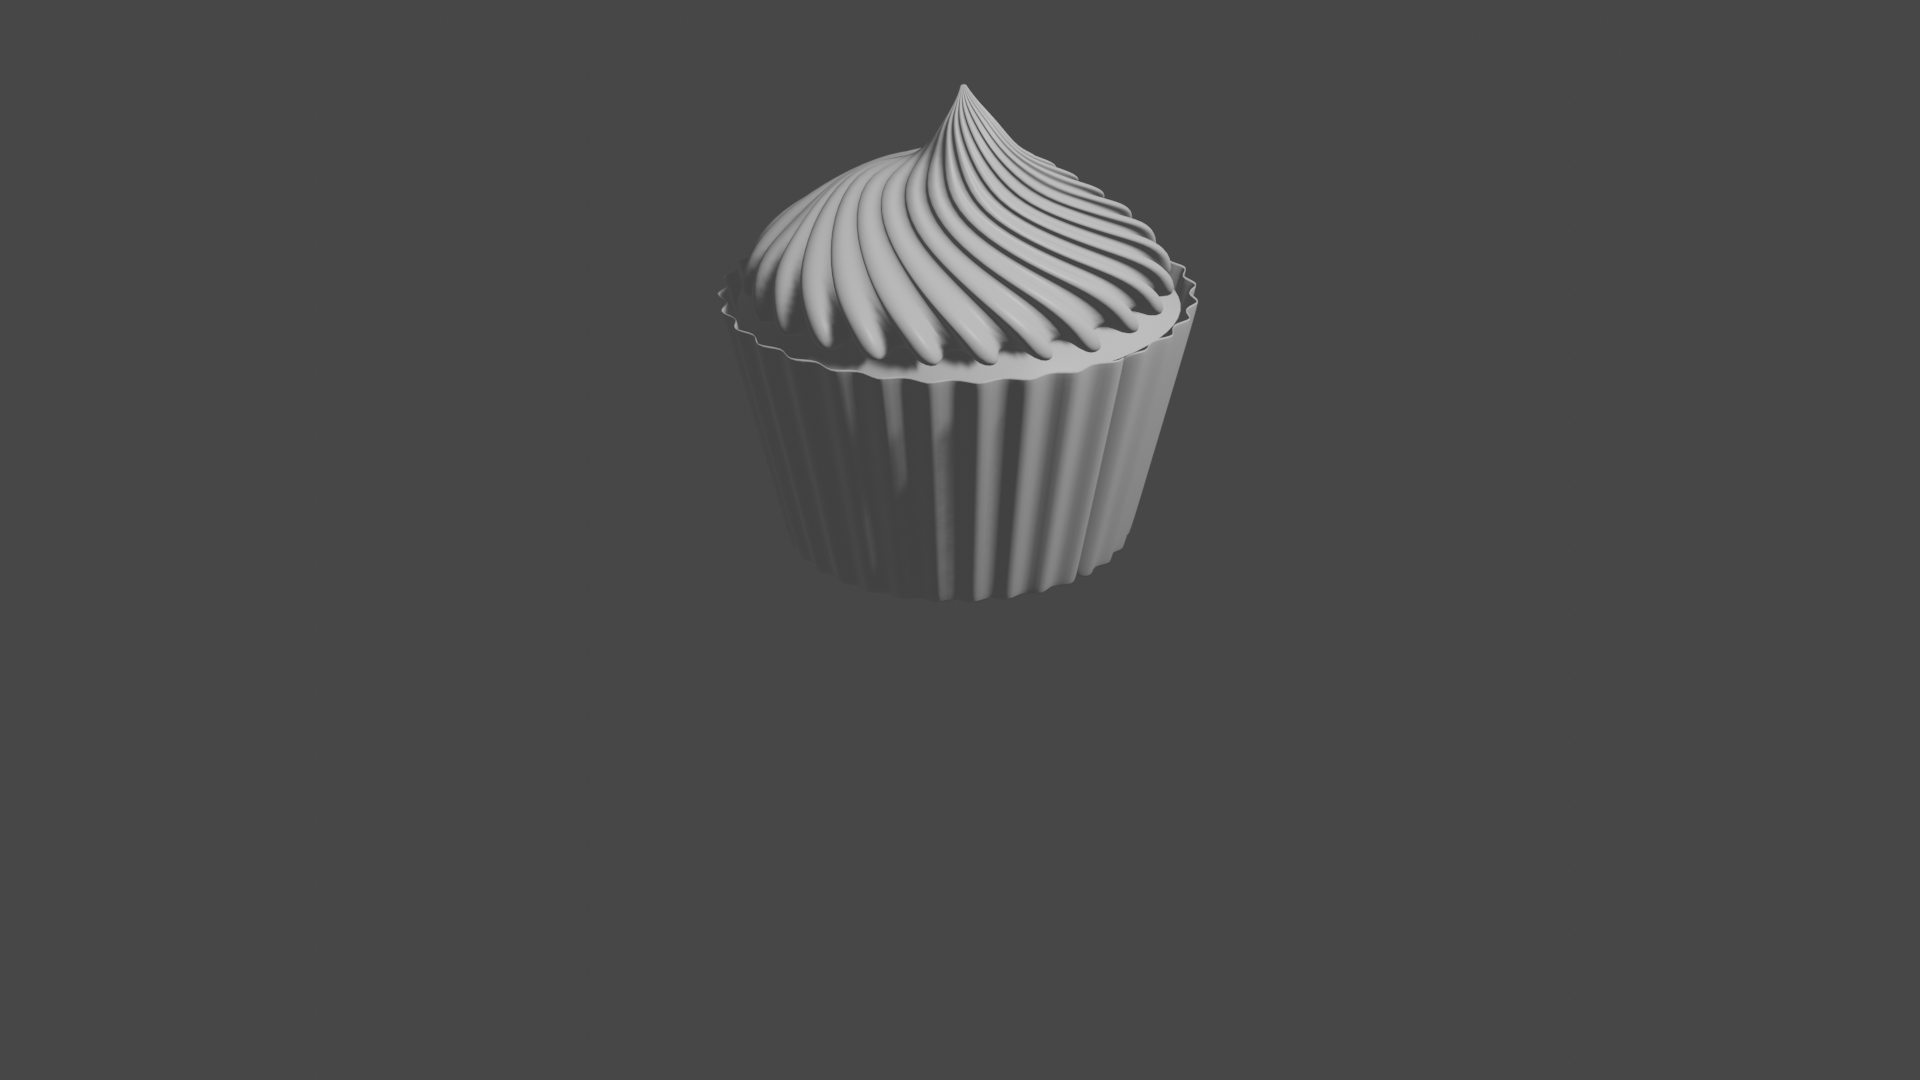
I found this great tutorial on making cupcakes in Blender, after my own disastrous attempt yesterday:
</center>
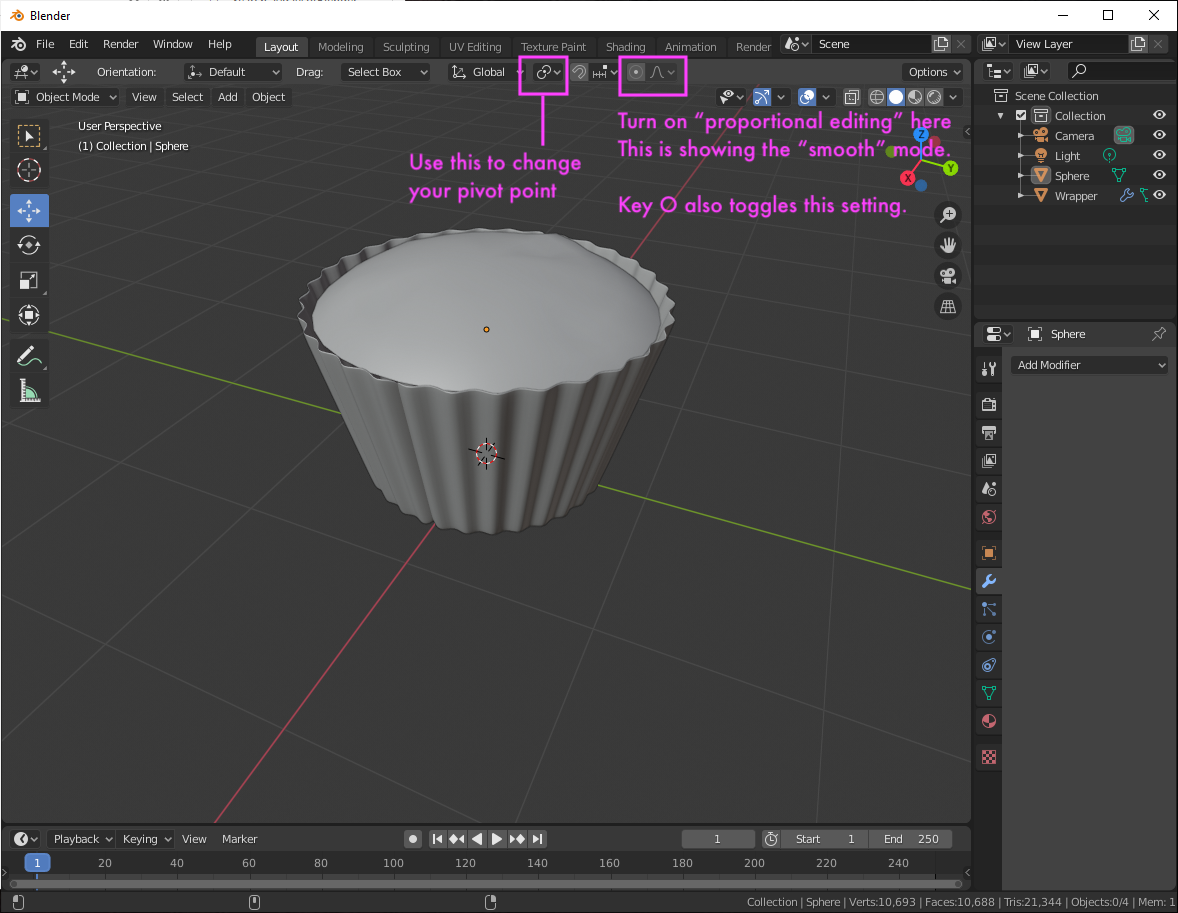
I got me feeling pretty comfortable using Edit Mode to transform the basic primitives that Blender offers into cupcake-like forms. Key to that process was using the Wireframe shading to see the vertices I wanted to select, and then using the now very familiar g key to move and s to scale them as needed. Shift+click is yet another favorite, and was pivotal (haha) to make that wrapper shaped as it was (basically, you select every other vertices of a circle, and then scale down, extrude, solidify).
The tutorial also had us turn on proportional editing to add subtle bumps to the shape of the cake for realism. (Hey, if those bumps are happening on your IRL cupcakes, you gotta work on your bake).
It was super satisfying to end the day with this form, after yesterday.
I’m hoping to revisit this tutorial because making the cream was somewhat complex, but seems essential enough that I want to internalize that workflow a bit more.
The most important keyboard shortcut I learned today was actually outside of Blender! I spend most of my time on a Mac, except for a handful of GPU-intensive tasks (and yes, games). Here’s what’s good for whatever screenshot floats your boat: Shift + Win + s.
A few others:
b: box select
Ctrl + 2: to add subdivisions (in edit mode, I believe)
Lydia Jessup and I are starting a new adventure where we try to make something in Blender for 50 days. Blender has long been on my list of must-learn software – it seems essential to everything I might be interested in doing, from 3D maps to IG filters to my AR cookbook!
I’m going to (for the most part) focus on that last project, because it is a lifetime dream of mine: to publish a series of augmented reality cookbooks. (Ideally, I would want those cookbooks would include both 3D models, as well as user-submitted photogrammetry, but that is another beast altogether). For this 50-day sprint, this focus will mean that I am primarily interesting in making food-related objects that would concievably fit into those cookbooks.
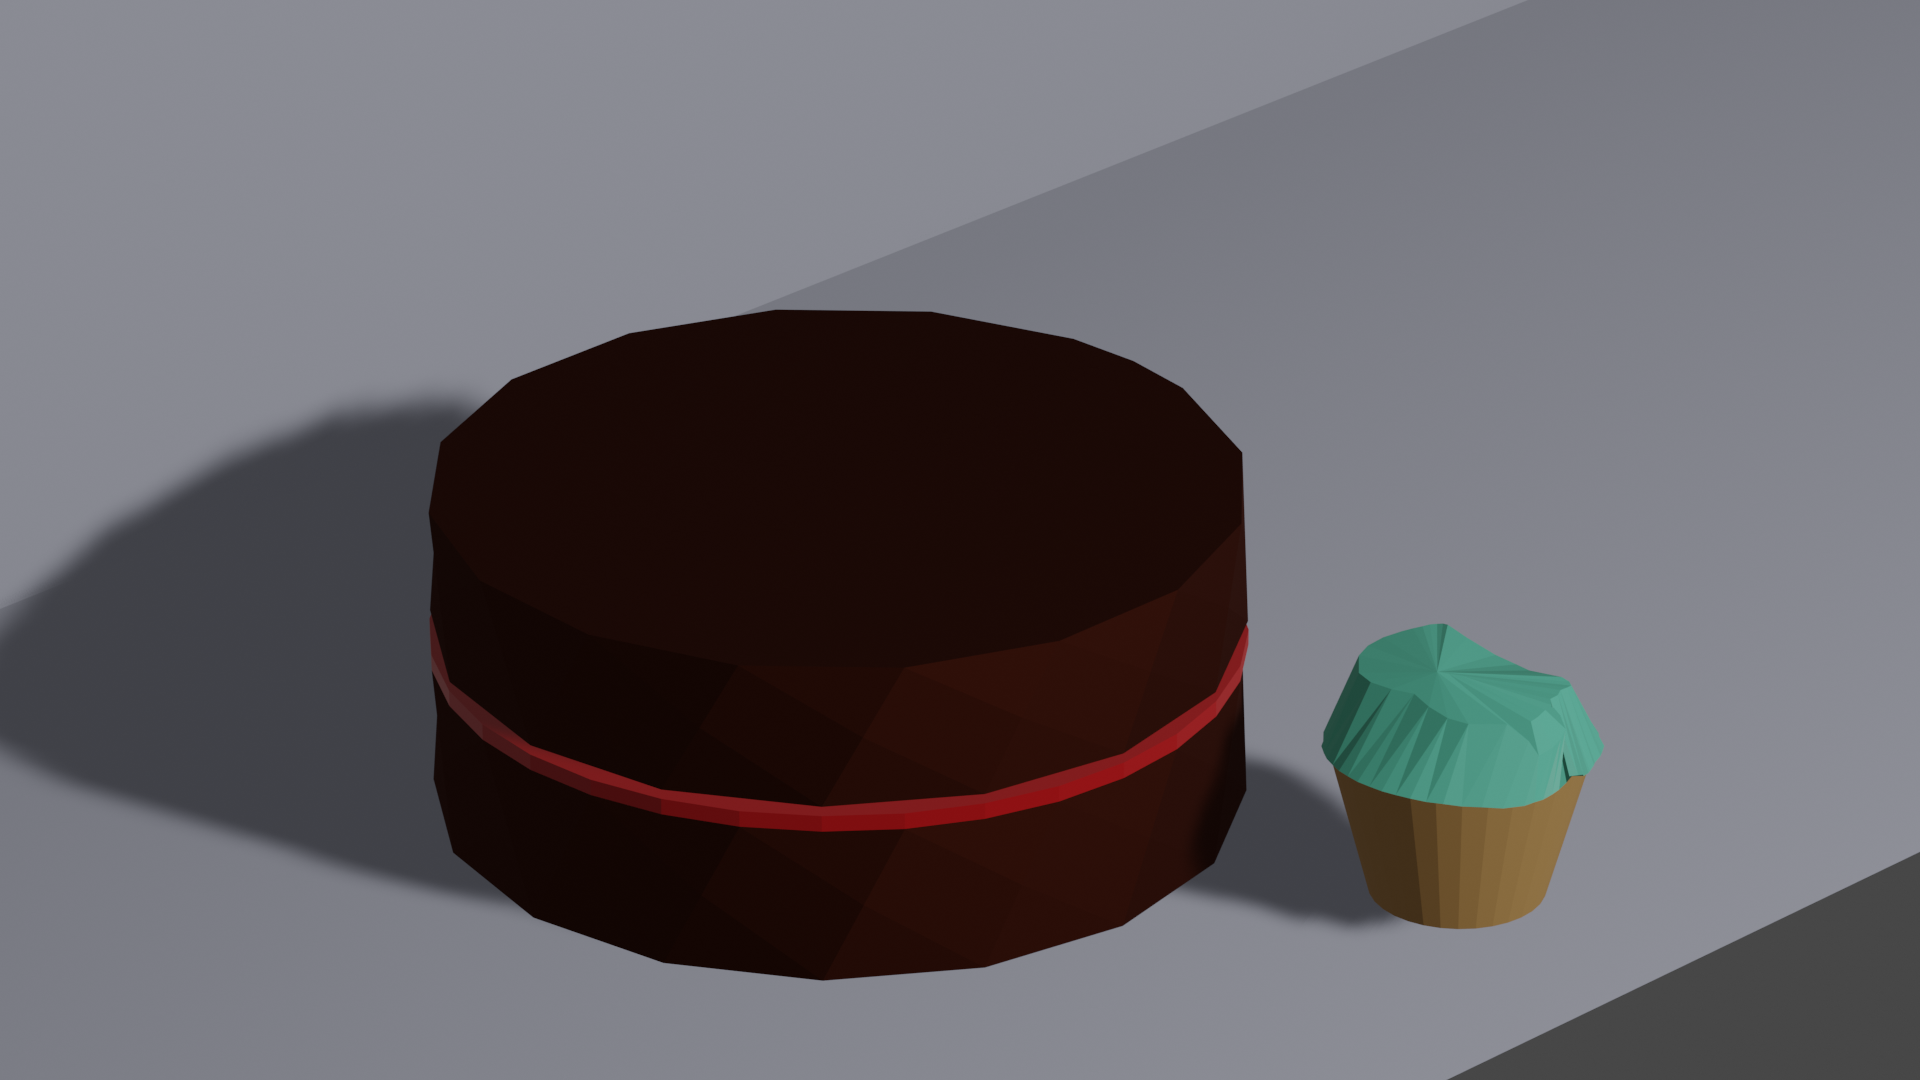
That is the lofty dream, immediately humbled by this day’s foray into actually trying to learn Blender. I focused on this set of beginner tutorials from The CG Essentials on YouTube. Already a fan of this account because the tutorials are short enough that they are not overwhelming. I ended up watching all of the tutorials in this playlist, and making the worst possible 3D modelled confectionaries I have ever seen in the world:
Truly heinous.
Nowhere to go but up!
Some keyboard shortcuts I learned:
g: move tool, hit x, y, or z to move only along that axis. use Shift + any of those letters to exclude that axis.
z: shading options
Tab: to toggle between Object and Edit modes
r: rotate tool
s: scale tool
Shift + a: add an object
e: extrude (edit mode)
i: inset tool (edit mode)
3: face selection mode (edit mode)
2: edge selection mode (edit mode)
1: vertices selection mode (edit mode)
Ctrl + r: loop cut (edit mode)
x: delete
Other random things I learned:
Blender will place objects where your 3D cursor is.
Edit mode allows you to add materials to individual faces, whereas Object mode applies the material to the whole model.
Modifiers like “Mirror” live in the righthand panel (name??) – toggle clipping to prevent extra geometry.
To taper, you can just select one face of an object, and then scale it.
Two render engines in Blender: (1) eevee and (2) cycles. (1) is fast, good for approximate. (2) is a path tracer (literally calculating the path of the light in the scene), slower but more realistic.
I also have some notes pertaining to how to apply textures using the node editor. But in all honesty, did not get very far into that topic, so we’ll have to save that for another day.
Accountability buddies are so important! Vivien and I are encouraging each other to finish up the 3D for Designers course we both bought ages ago.
Finally completed the project for the “Form” topic:
This was fun because required a good bit of modeling using splines and lathes. I have handwritten notes on what I’ve learned so far, and will digitize soon.
One of my personal enrichment endeavors this summer is taking an online “Cinema 4D for Designers” course. The 4 seconds of video seen above was created using Cinema 4D Lite & After Effects. It’s quite simple: it is a plane object with a gradient material, with a wind deform applied. While the addition of many more compositional elements are possible in AE, I added very little for today.
Most of my prior experiences with web development had utilized server setups in which Heroku had done most of the server configuration magic for me, OR, I was hosting static pages on Github Pages. I wanted to setup something more “robust,” for the ITP library, and give myself the possibility of doing some more interesting things on the server-side, including the possibility of maintaining my own databases (a glimmer of an idea for now, given that I intend to see how far I can get with just Google Sheets at first).